Email Automation Builder
 Updated
by Raquel Bartolome
Updated
by Raquel Bartolome
This is our email automation with smart sending technology, S.o.L.D. (Signs of Life Detector), that analyzes data on recipient behavior, such as open rates and click-through rates, to determine which leads will move to the next stage of your email outreach.
By automating the process of sending emails and using S.o.L.D., you can save time and resources while also increasing the effectiveness of your email marketing campaigns.
It is a prerequisite to Connect an Email Account when creating an Email Automation. Please refer to this article for instructions in connecting your Email Account: Email Outbound Tools How to Activate Customers.ai ESP
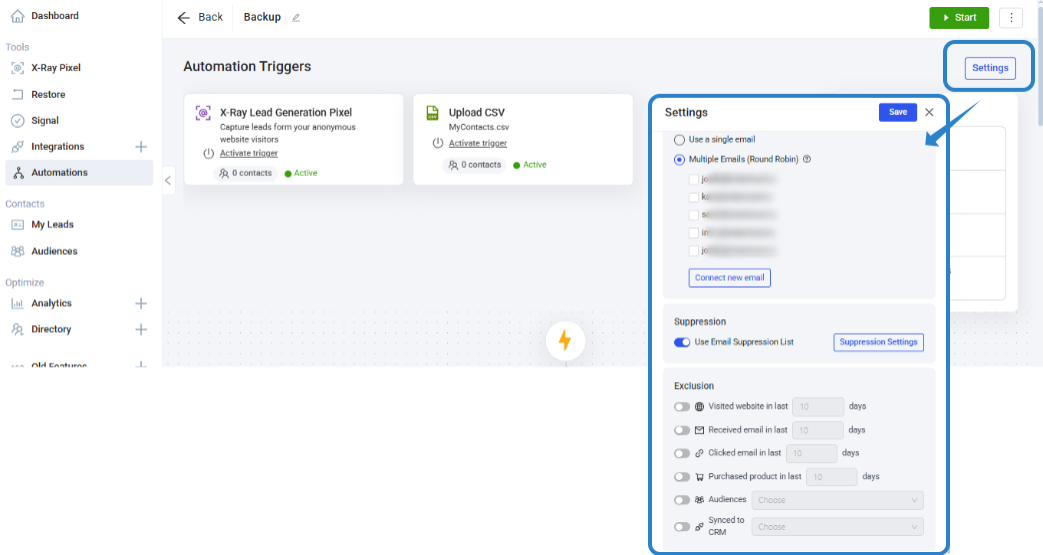
Configure Automation Settings
Click on SETTINGS to configure the email address/ addresses that will be used to send the email automation. Take note that these settings need to be set PER automation. Setting this up for one Automation WILL NOT make this the default settings NOR it will be affect existing & future Automations. If an Email address has not been connected before, this step will prompt you to connect an email account.
When using SUPPRESSION, make sure that your SUPPRESSION SETTINGS are configured under Integrations.
Set EXCLUSION conditions if you want to further exclude leads that falls under the conditions set.
When using SUPPRESSION, make sure that your SUPPRESSION SETTINGS are configured under Integrations.
Set EXCLUSION conditions if you want to further exclude leads that falls under the conditions set.
Create an Automation Trigger
Click on + ADD TRIGGER to select the action that will initiate the automation. Keep in mind that this is an Email Automation, and it is therefore, mandatory for you to collect your lead's email address on these input triggers. You can check our help articles for guidance in creating Input Triggers: Facebook Input Triggers, Instagram Input Triggers, Import contacts, X-Ray Lead Generator, Website Chat Widget Input Trigger.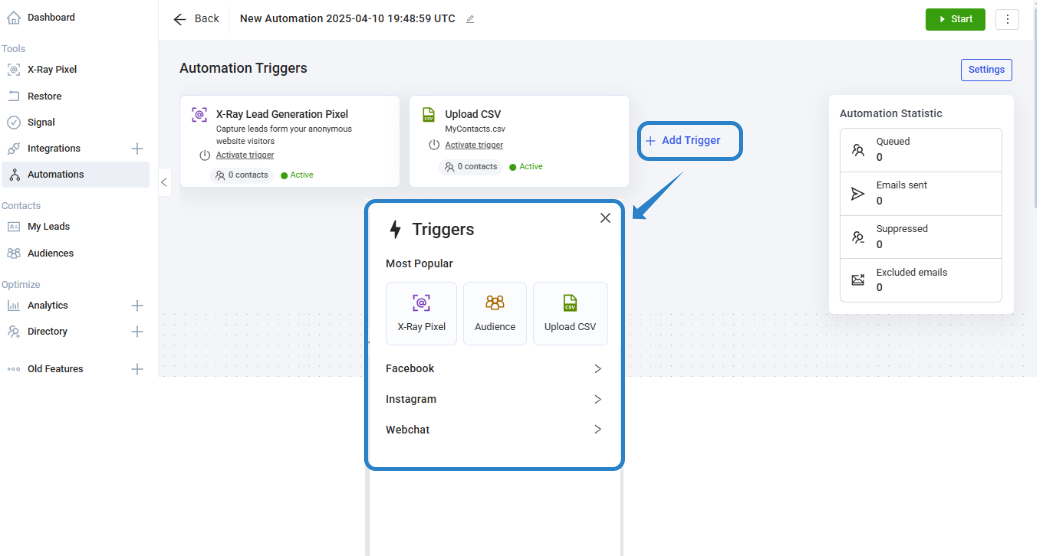
Create Email Automation
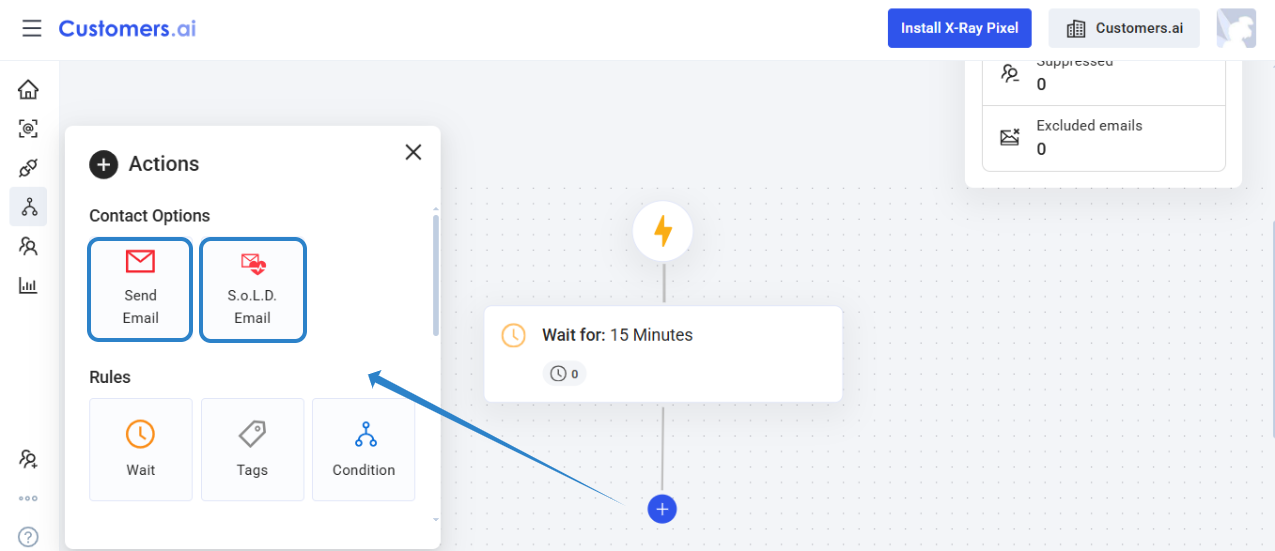
Set the wait time from the time the Automation Trigger is activated or a new lead is added to the Trigger.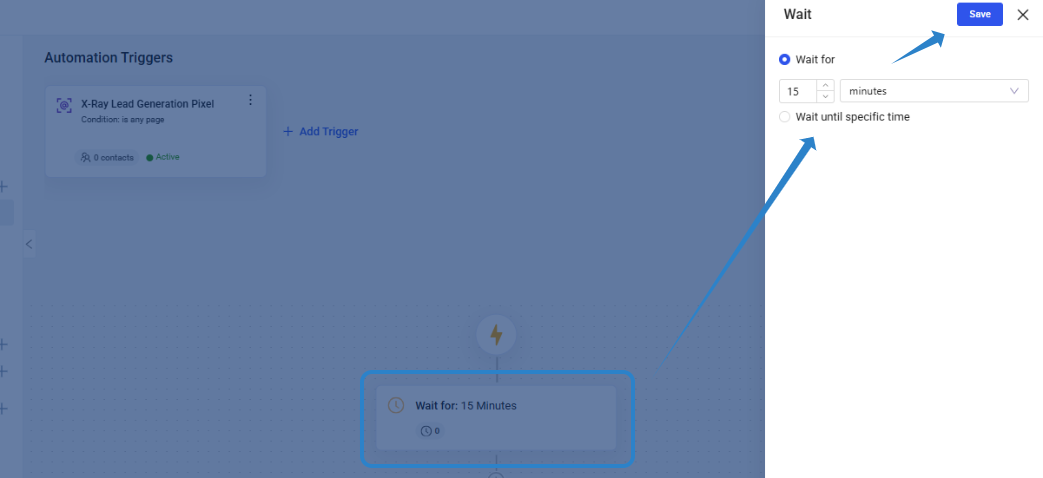
There are two Contact Options:
1.) Send Email
2.) SoLD Email
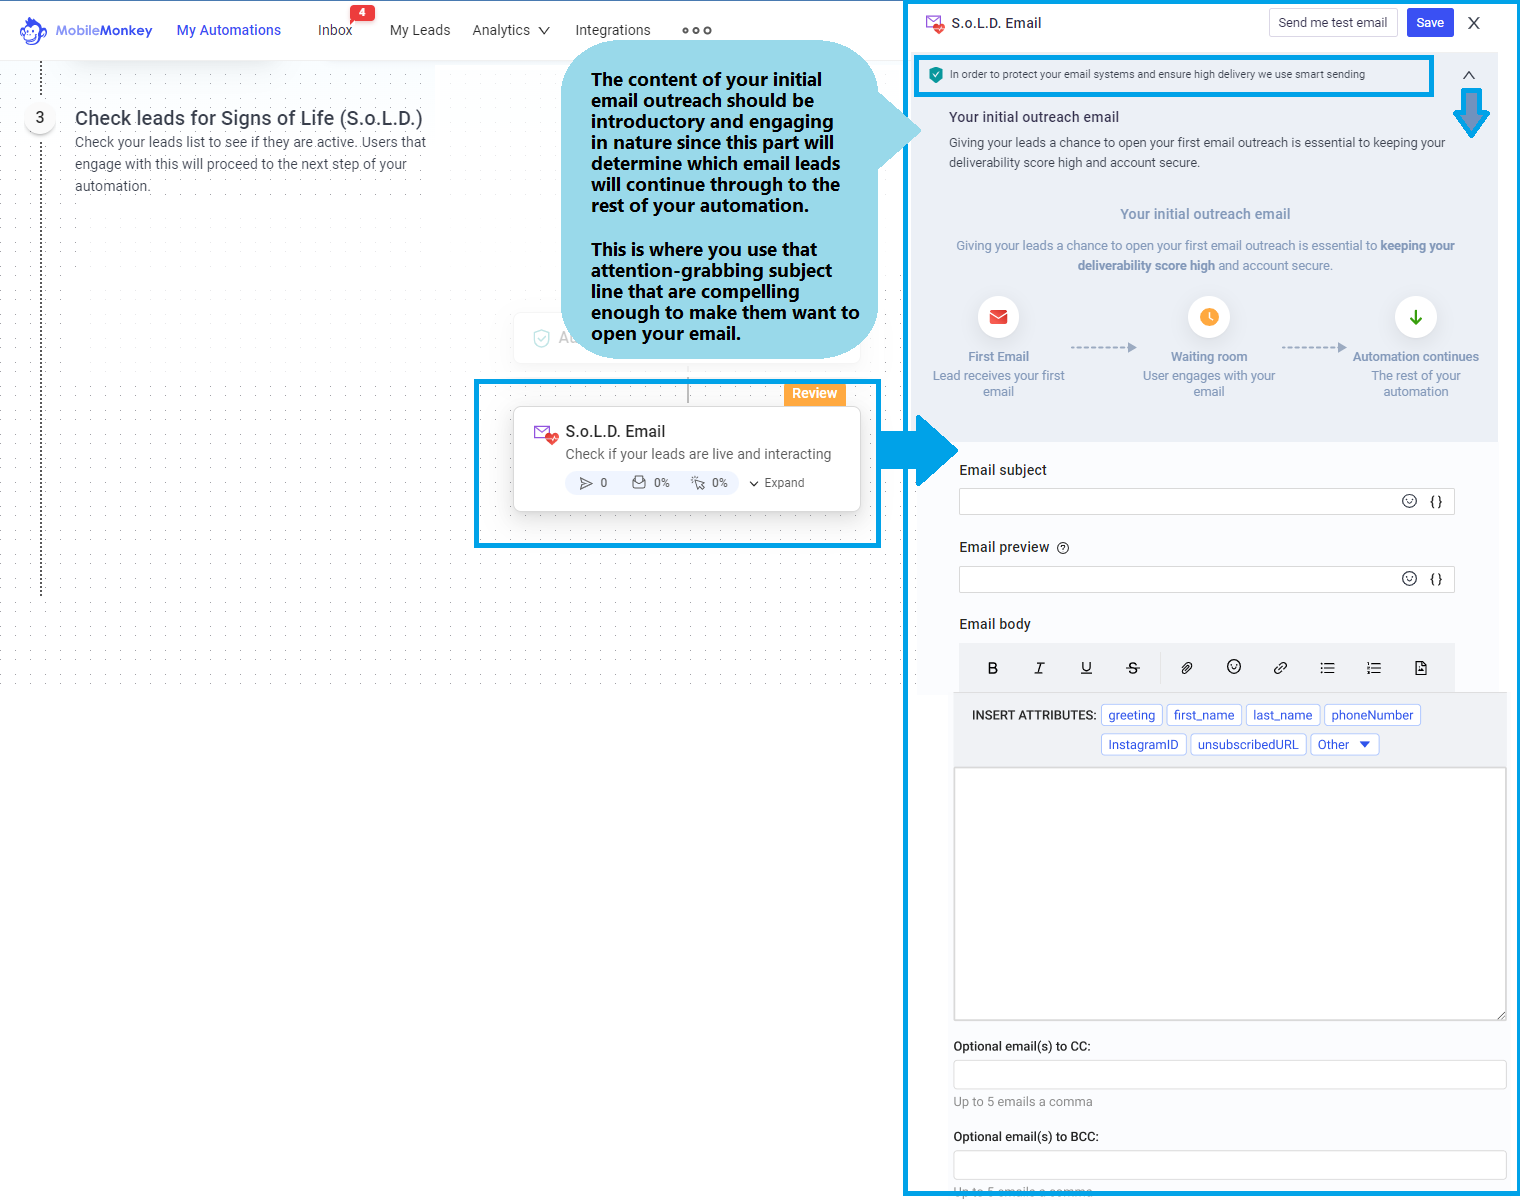
SoLD Email
Only leads that are active and valid will proceed to the next Email message. We use smart sending to make sure that your email is protected. This will increase the effectiveness of your email campaigns by delivering messages to recipients who are most likely to engage with your future emails, leading to higher quality interactions.
Send Email
Email flow will send the email message regardless of interaction. Tracking of clicks and opens will still be recorded and can be used to set the condition of the automation flow.
The A.I.Email Customizer tailors the content of the "Master Email" based on the landing page content.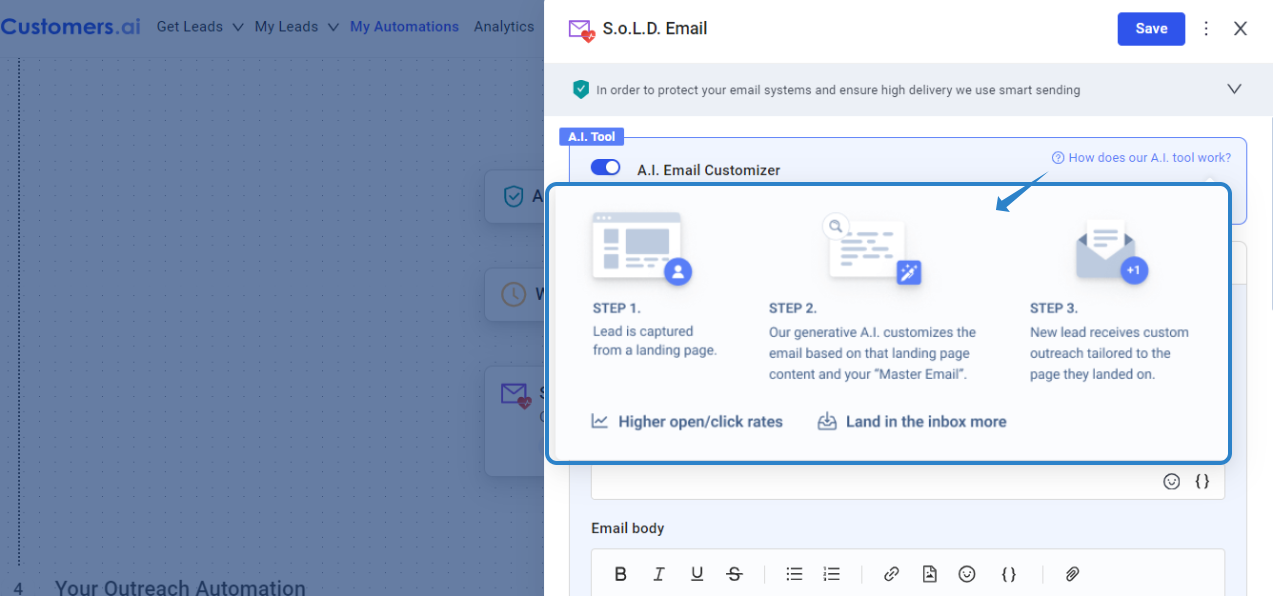
Generate email automatically based on the landing page.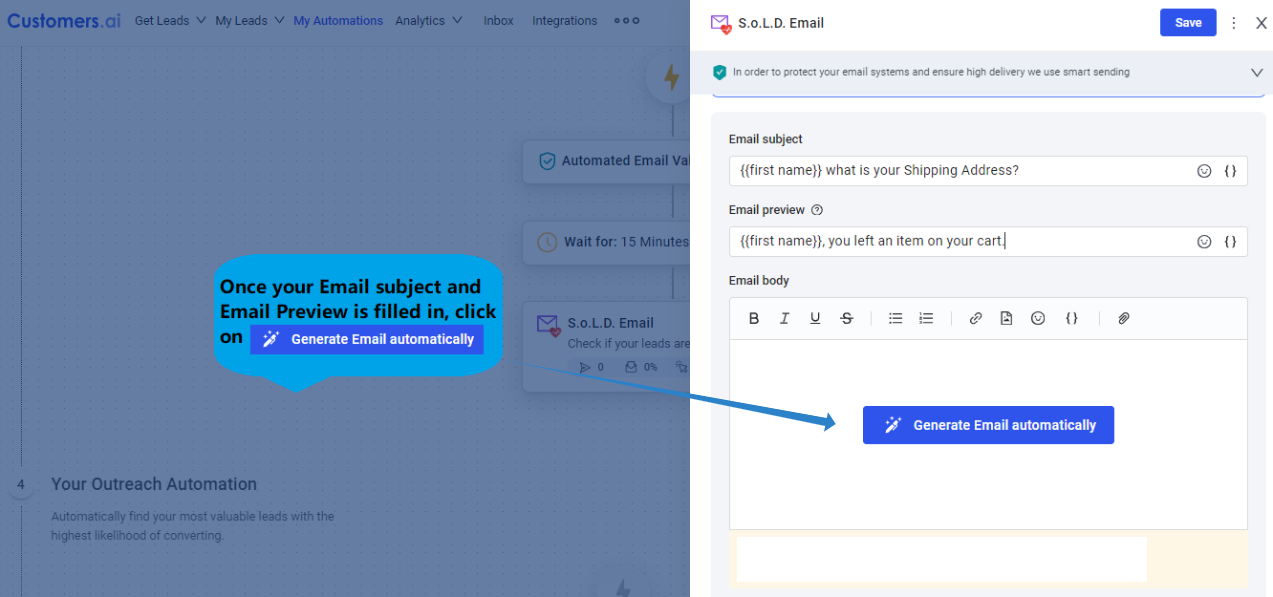
Input your landing page and click on Generate Email. The "Additional information about your business" is optional, but is recommended!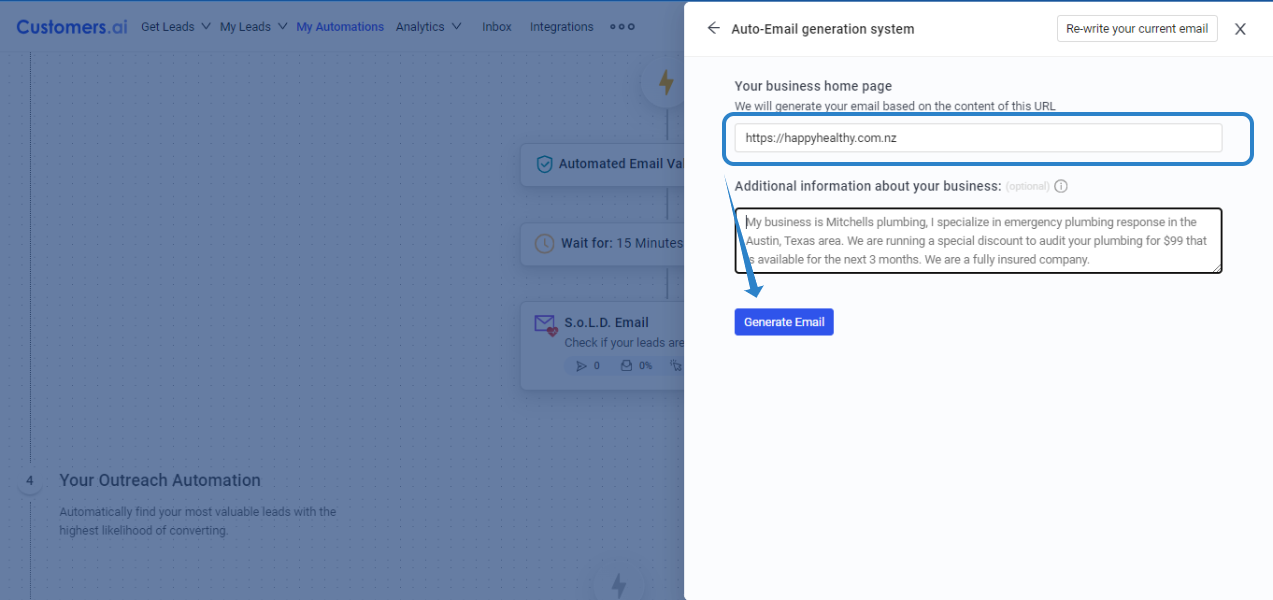
Finalize your Master Email.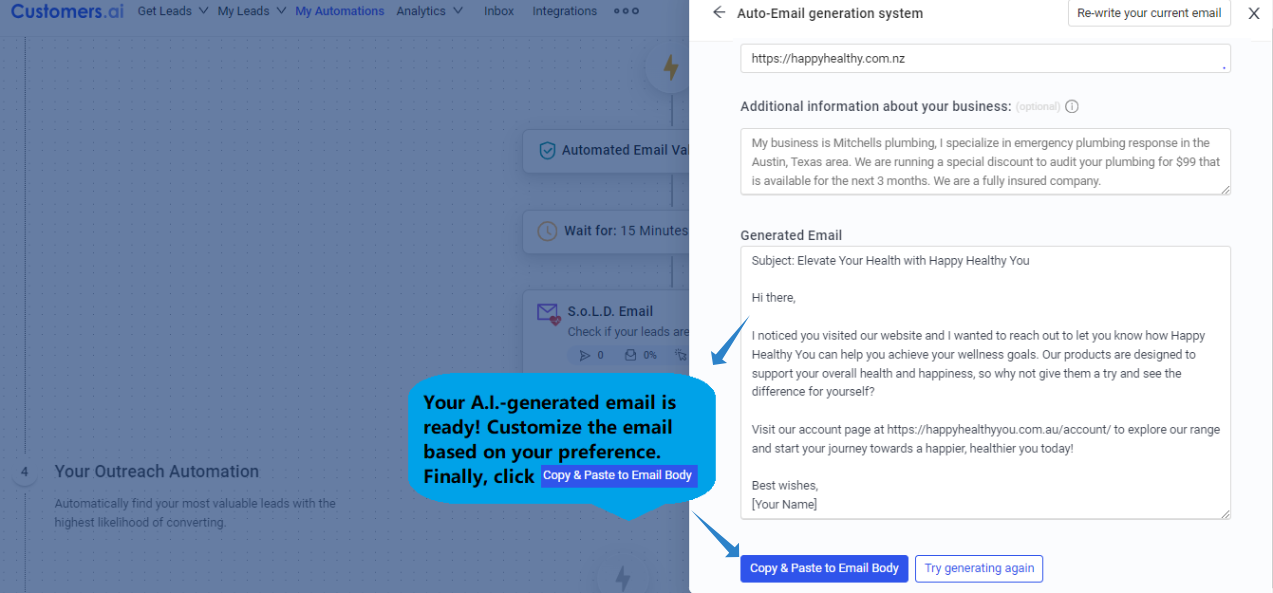
Analytics summary is accessible on the automation.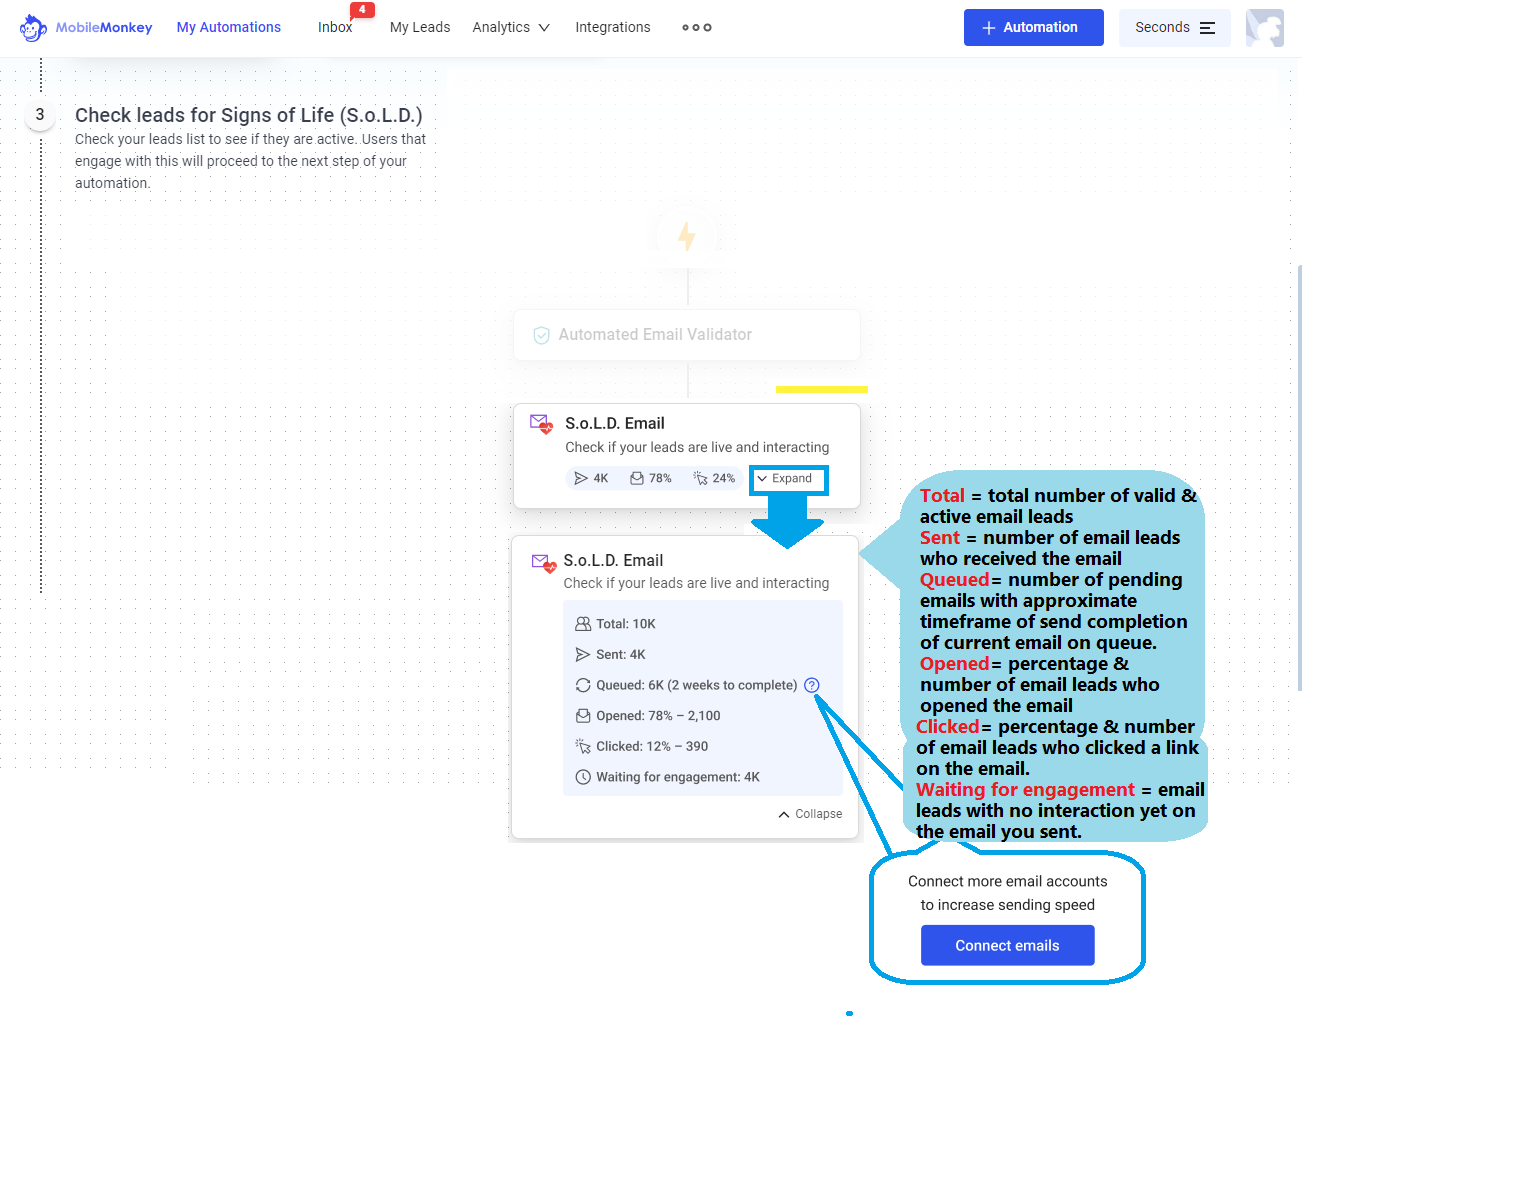
There are two Contact Options:
1.) Send Email
2.) SoLD Email
SoLD Email
Only leads that are active and valid will proceed to the next Email message. We use smart sending to make sure that your email is protected. This will increase the effectiveness of your email campaigns by delivering messages to recipients who are most likely to engage with your future emails, leading to higher quality interactions.
Send Email
Email flow will send the email message regardless of interaction. Tracking of clicks and opens will still be recorded and can be used to set the condition of the automation flow.
The A.I.Email Customizer tailors the content of the "Master Email" based on the landing page content.
Generate email automatically based on the landing page.
Input your landing page and click on Generate Email. The "Additional information about your business" is optional, but is recommended!
Finalize your Master Email.
Analytics summary is accessible on the automation.
Your Outreach Automation
Automatically find your most valuable leads with the highest likelihood of converting by using CONDITIONS, TAGS and WAIT.
WAIT
This adds a timeframe to when the next ACTION is executed. Take note that there are 2 options and the WAIT UNTIL SPECIFIC TIME works if your TRIGGER is a static list vs an Audience wherein leads are continuously added.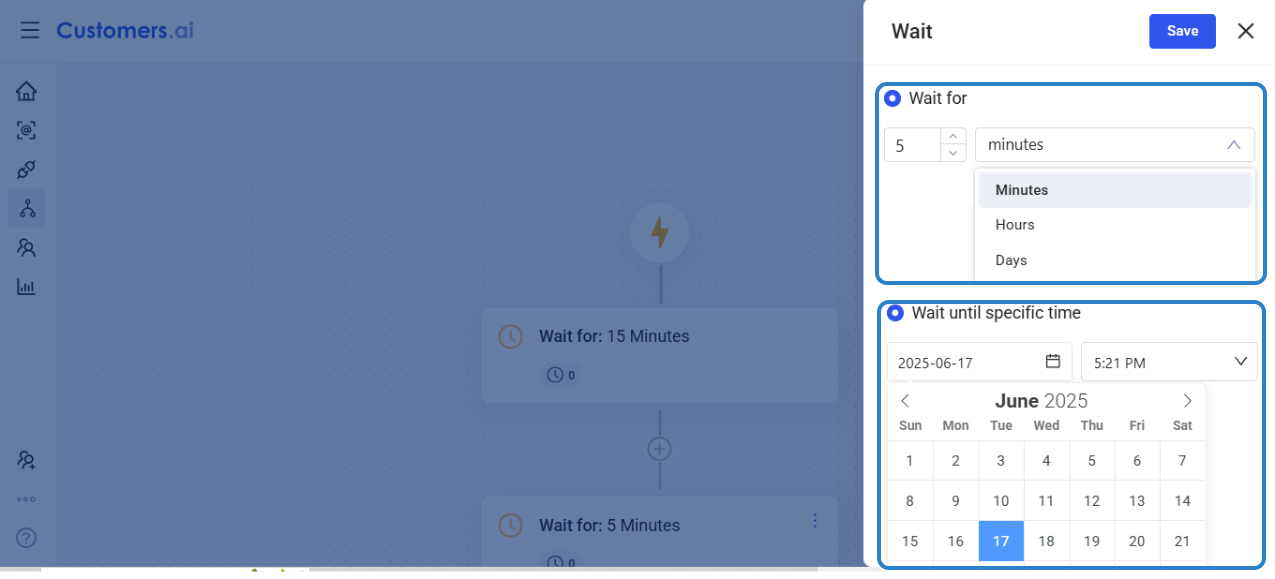
TAGS
Tag labels leads to help manage, segment, and trigger actions in the automation. A tag can be ADDED or REMOVED during the course of the automation.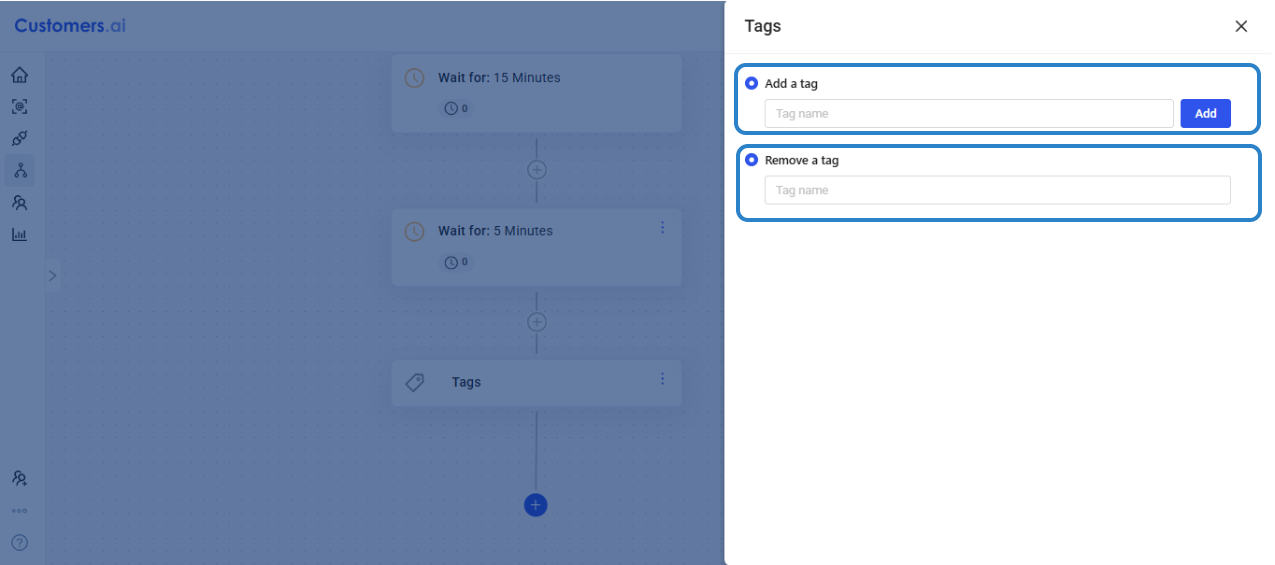
CONDITIONS
Set condition/s to dynamically tailor the flow of your email automation based on their Interaction, Customer Journey, Tags and Attributes.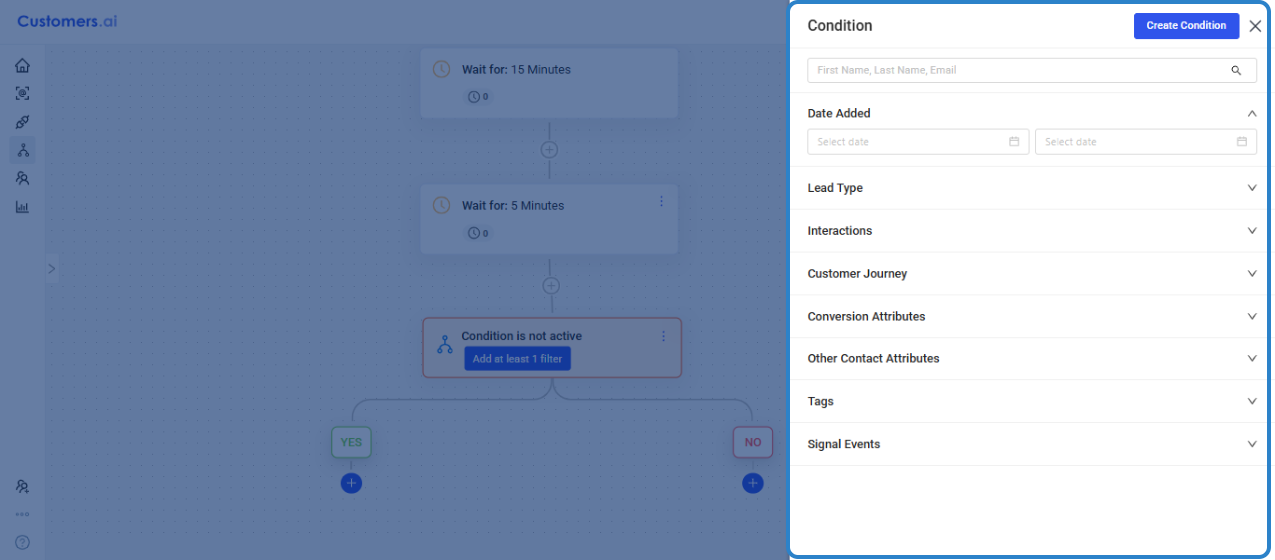
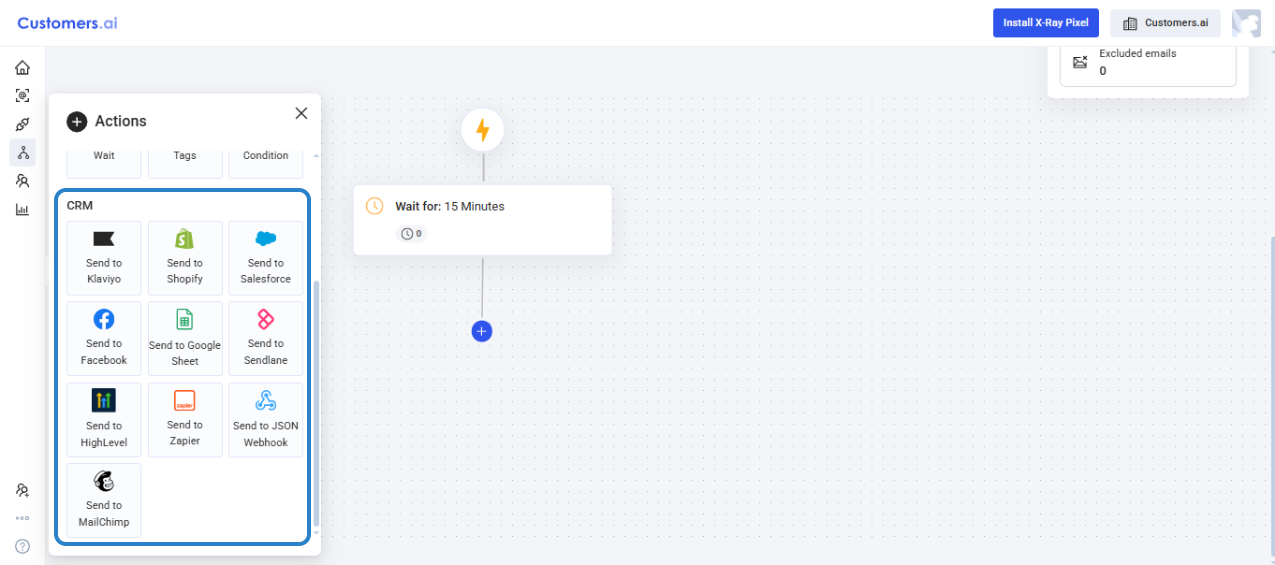
CRM Integrations
At any poiint on your Email Automation, you can sync the leads to your preferred CRM/s. Make sure that your connection does not conflict with any current, active integrations. You may refer to this section for a more details on each CRM ➡️ CRM Integrations