Create Audience Segments
 Updated
by Raquel Bartolome
Updated
by Raquel Bartolome
In this article you will learn how to build meaningful segments of identity resolved leads. Once you create an audience, you can take action on that audience, such as syncing to sales and marketing workflows.
Every contact resolved on your website is saved as a lead in Customers.ai. While you can control the contacts you resolve at the capture settings level, you design the marketing actions you want to take on Leads starting from within Audiences.
What is an Attribute?
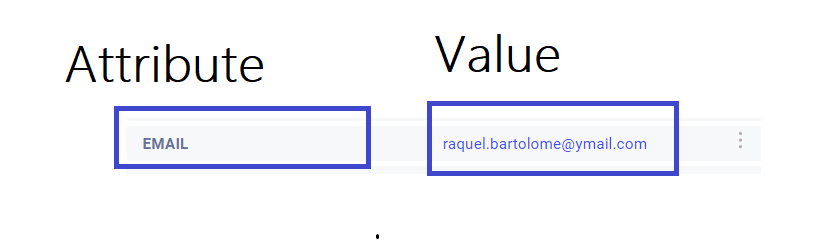
An Attribute is a field or placeholder of lead information like a lead's first name, e-mail address and the like.
The Value is the actual lead information, that may be unique for each lead.
You will use an attribute or a combination of attributes to filter your contacts into a more targeted Audience.
How add Attributes and/or Tags to a contact
There are attributes that are collected by default for a contact from the X-ray Pixel and from the Consumer Directory.
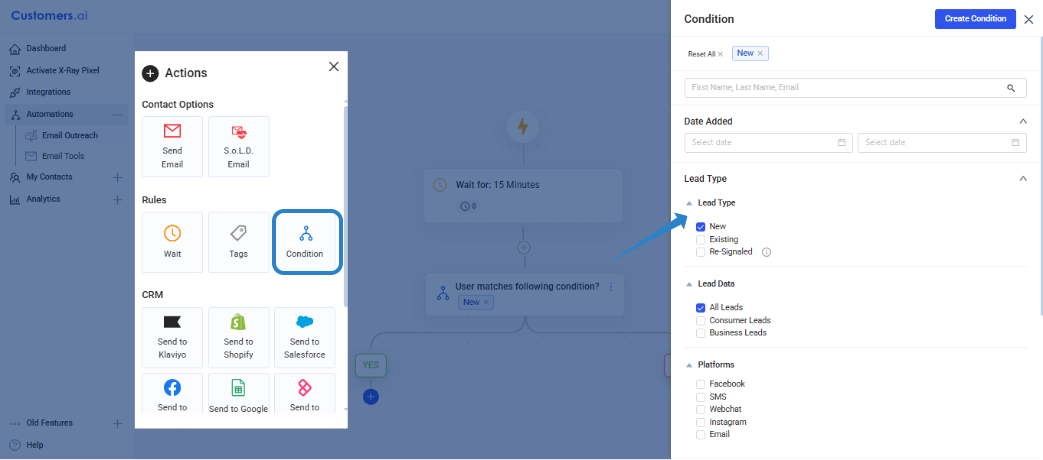
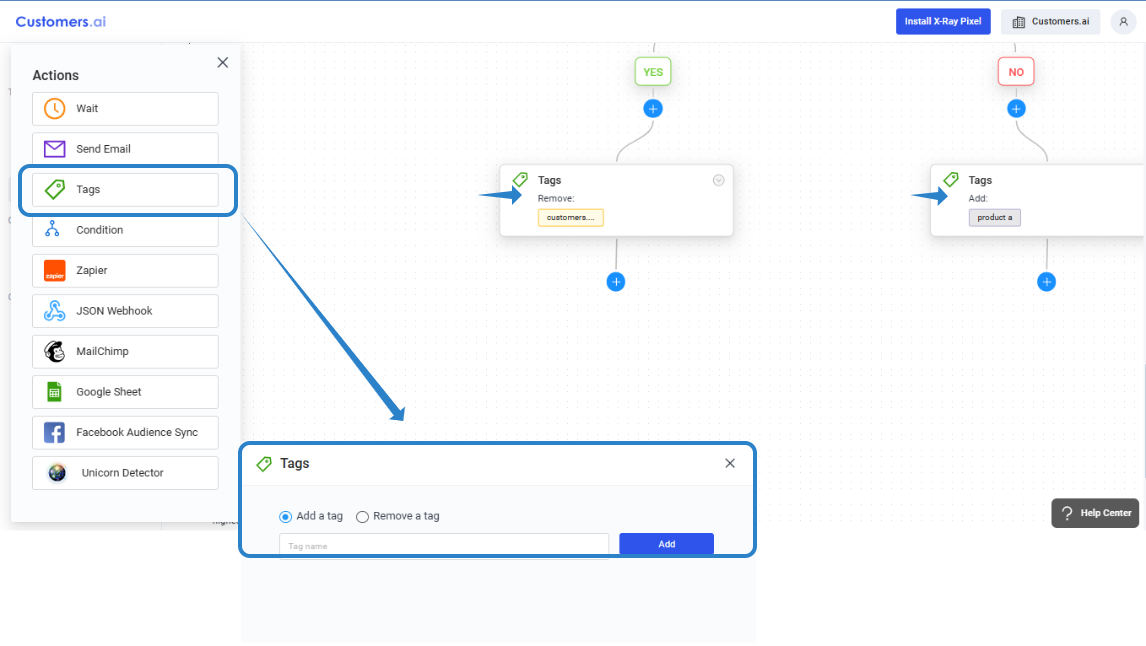
Assign a Tag via the Automation
One of the available actions on the SoLD Automation is TAGS which allows users to Add or Remove a Tag to contacts depending on the actions/behavior of the contact.
For Instance, you can assign a TAG to users who click a link on the email you sent and assign a different TAG to users who read the email but did not click the link.
Attribute Widget (on chat starters for social outreach and webchat)
You can add an attribute to a dialogue as a widget. You can assign an attribute and value while the lead goes through your conversation flow/funnel.

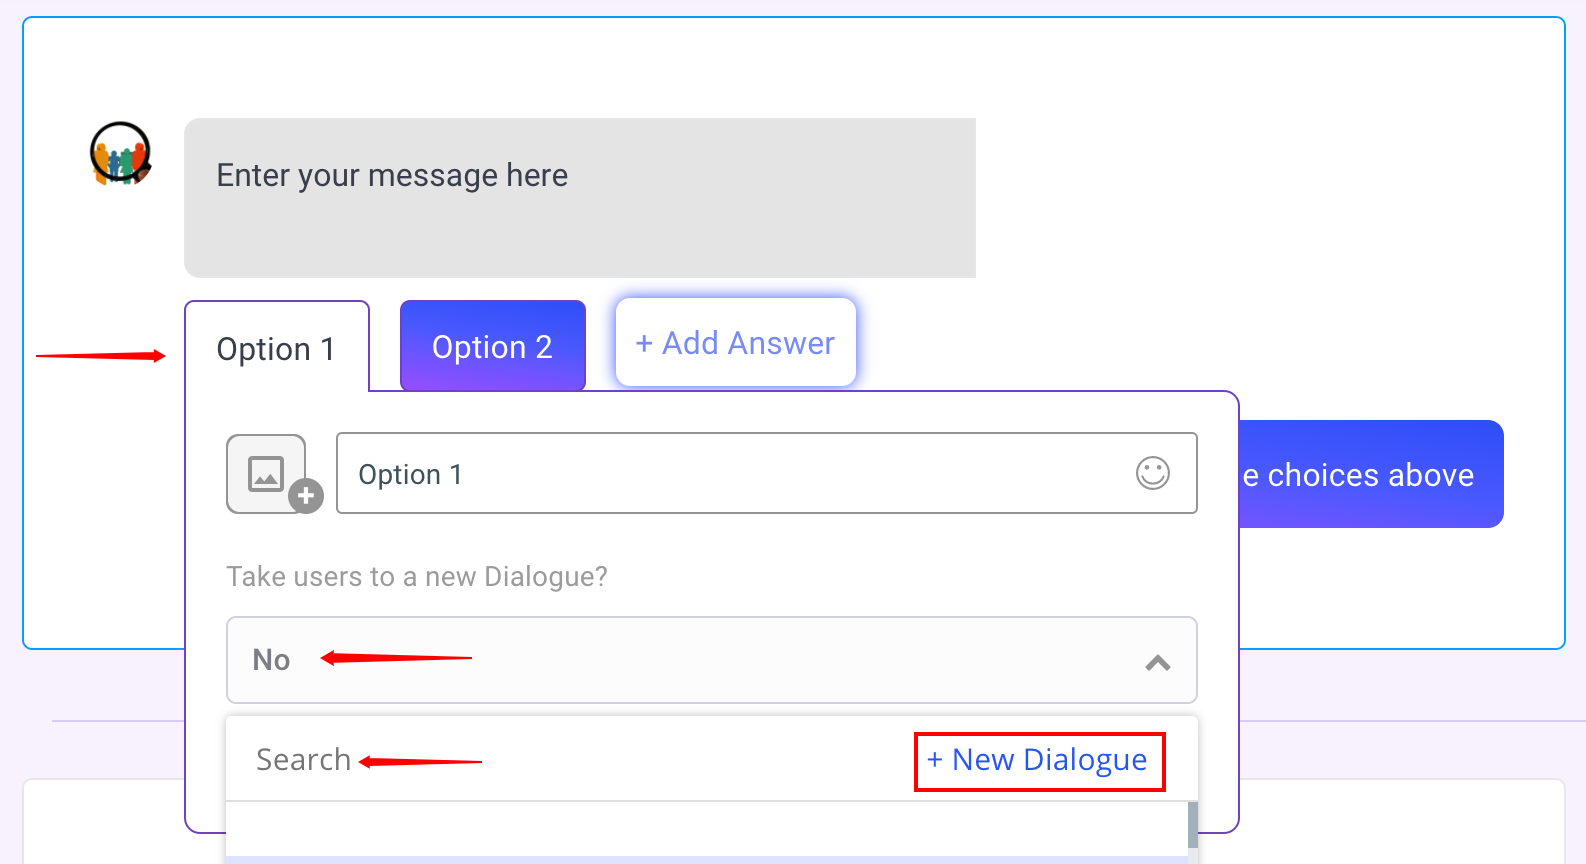
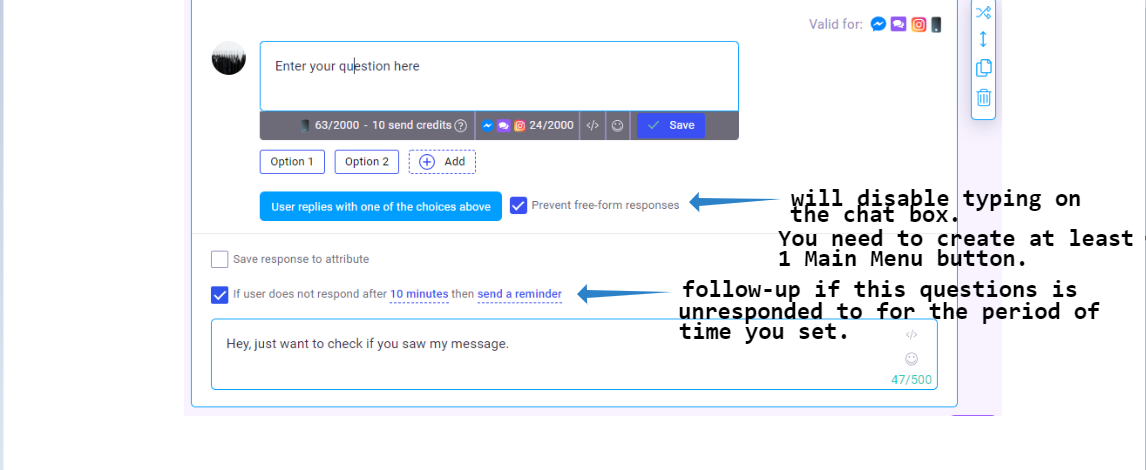
Options Widget (on chat starters for social outreach and webchat)
Use this widget to provide multiple choices, displayed as "buttons"; which are great for surveys or forms. Each option/ choice question can be attached to a dialogue path.
Each of these options can be saved to an attribute which you can use later in custom audiences.
Read more about Main Menu here.
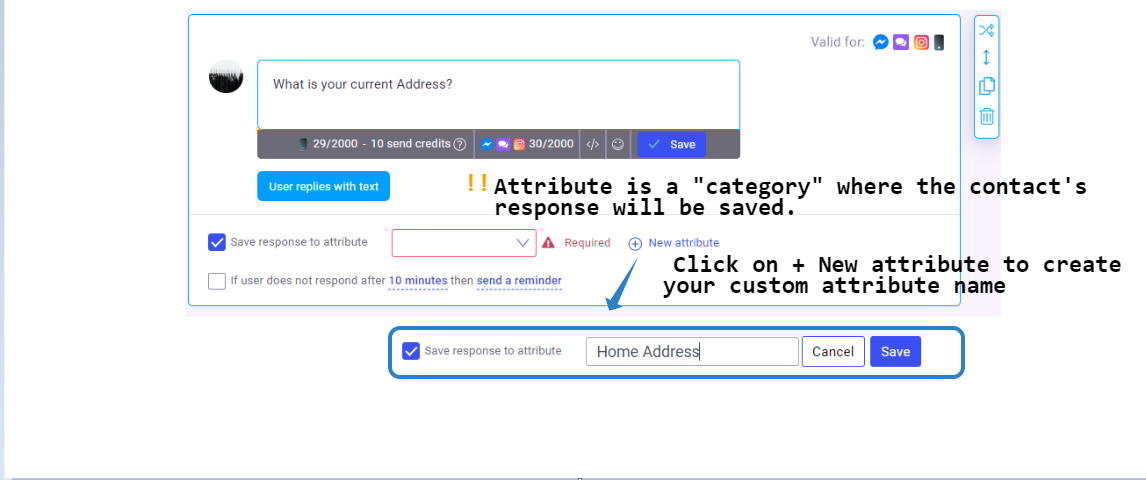
Ask for Info Widget (on chat starters for social outreach and webchat)
Use this to capture the users text or free-form response.
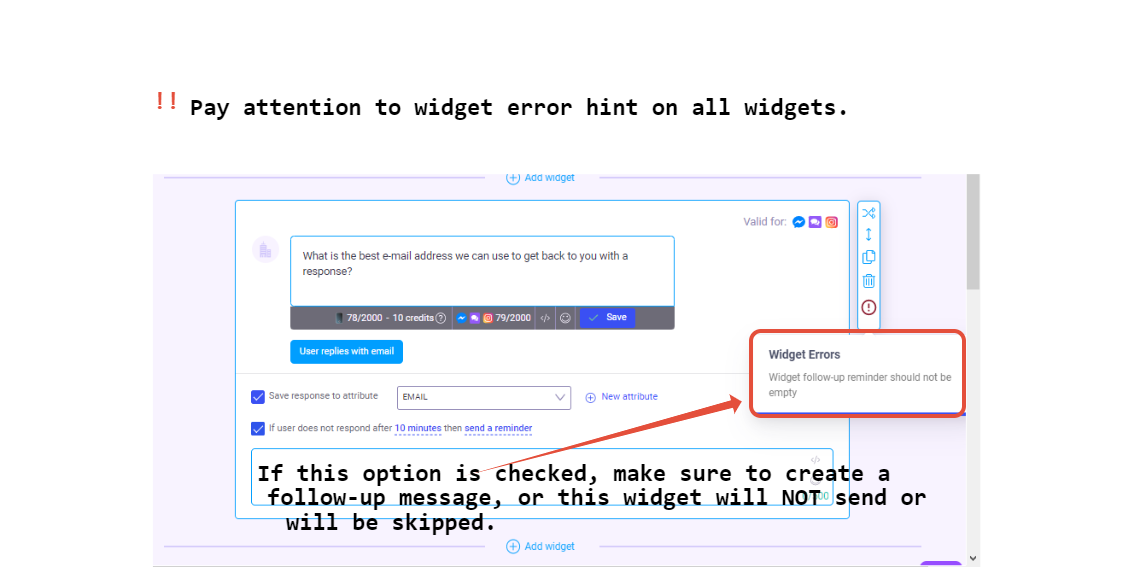
*Save response to attribute needs to be manually checked for Options and Ask Info widget in order to create a custom attribute with which the contact's response will be saved.
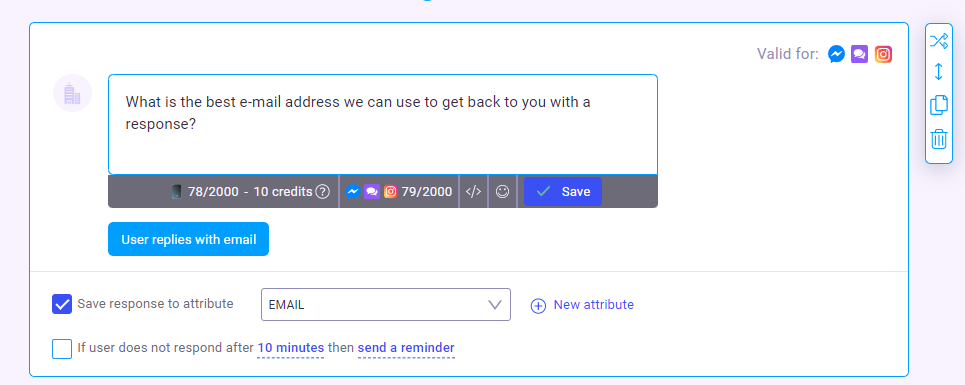
Ask for Email Widget (on chat starters for social outreach and webchat)
Use this widget to capture user's email address. This automatically saves contact's response to the EMAIL attribute
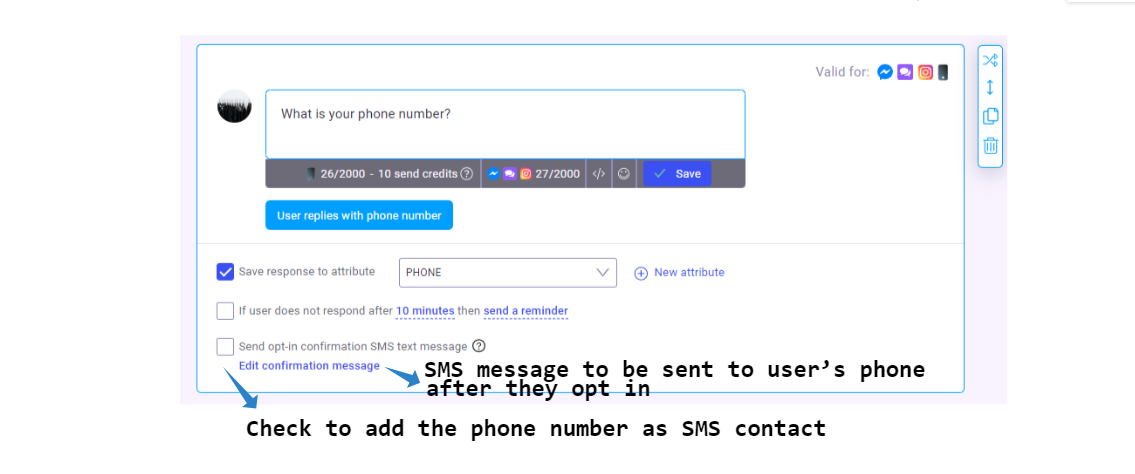
Ask for Phone Widget (on chat starters for social outreach and webchat)
This widget capture a user's phone number. This automatically saves contact's response to the PHONE attribute
General Reminder:
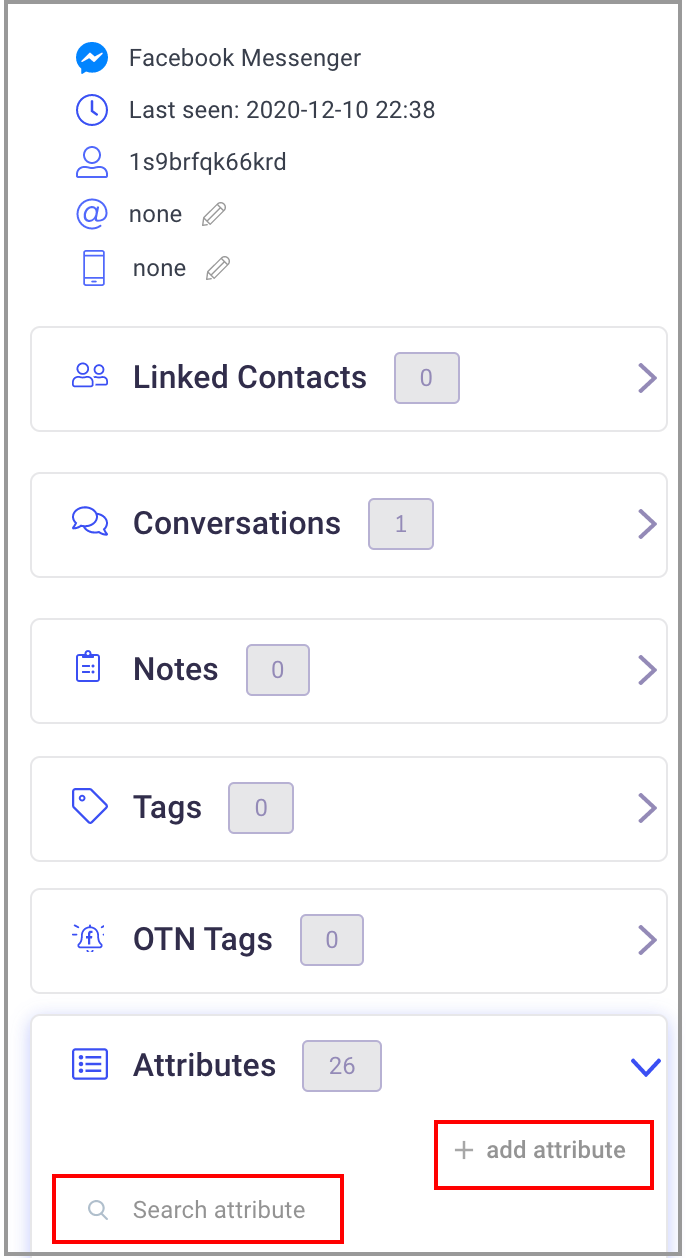
Where to Manage Attributes?
You can add or manage all your attributes from the Leads tab.
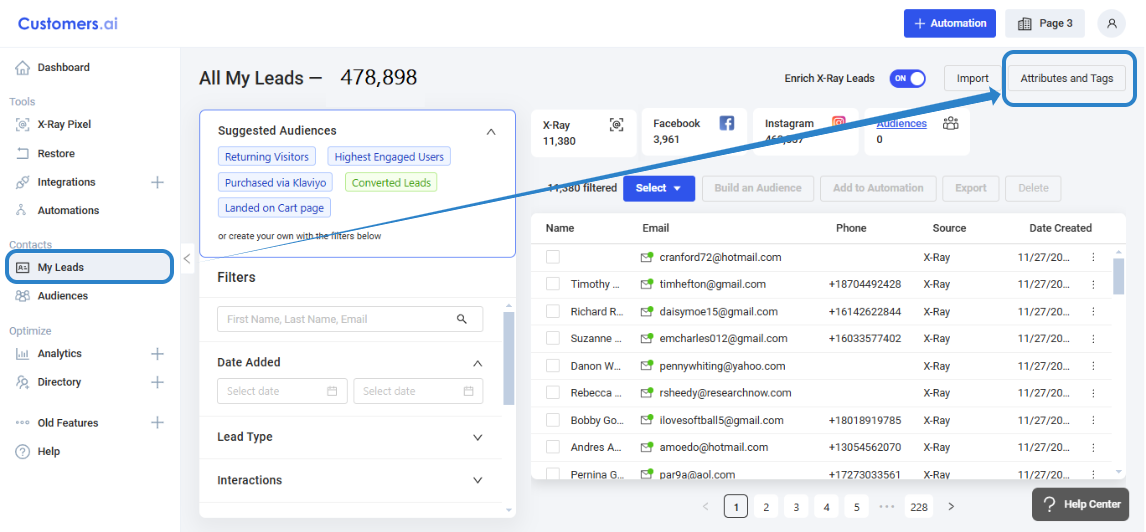
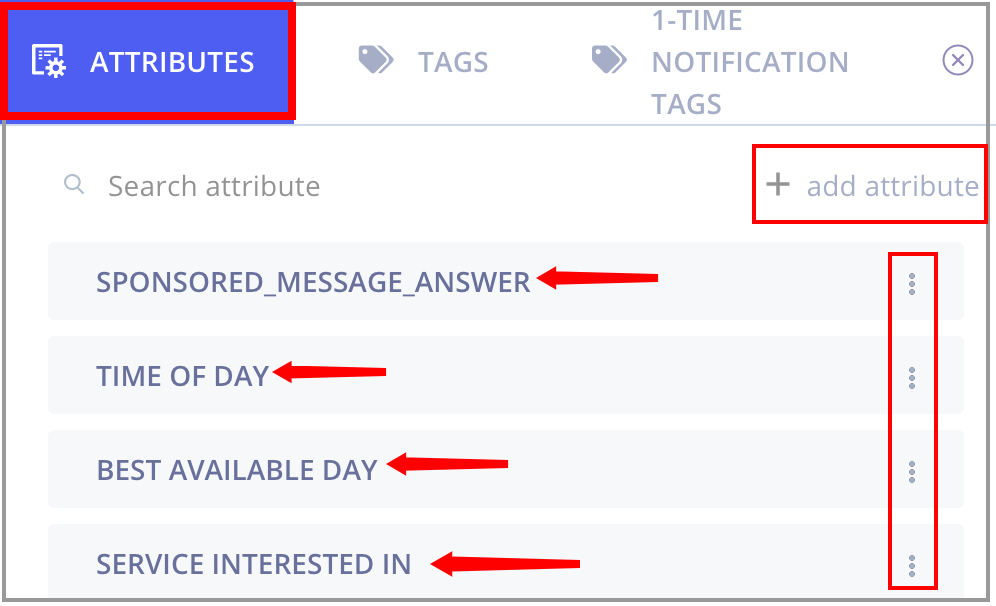
Clicking on the big blue attributes button will pop out a list of all your attributes. You can easily add or delete attributes from this section. Deleting an attribute from the lead section will remove the tag on ALL leads.
One other place you can manage attributes is through the inbox. By clicking on a user you can see the attributes assigned to them and you can add an attribute and value or edit a value on an existing attribute. However you cannot delete an attribute from the inbox.
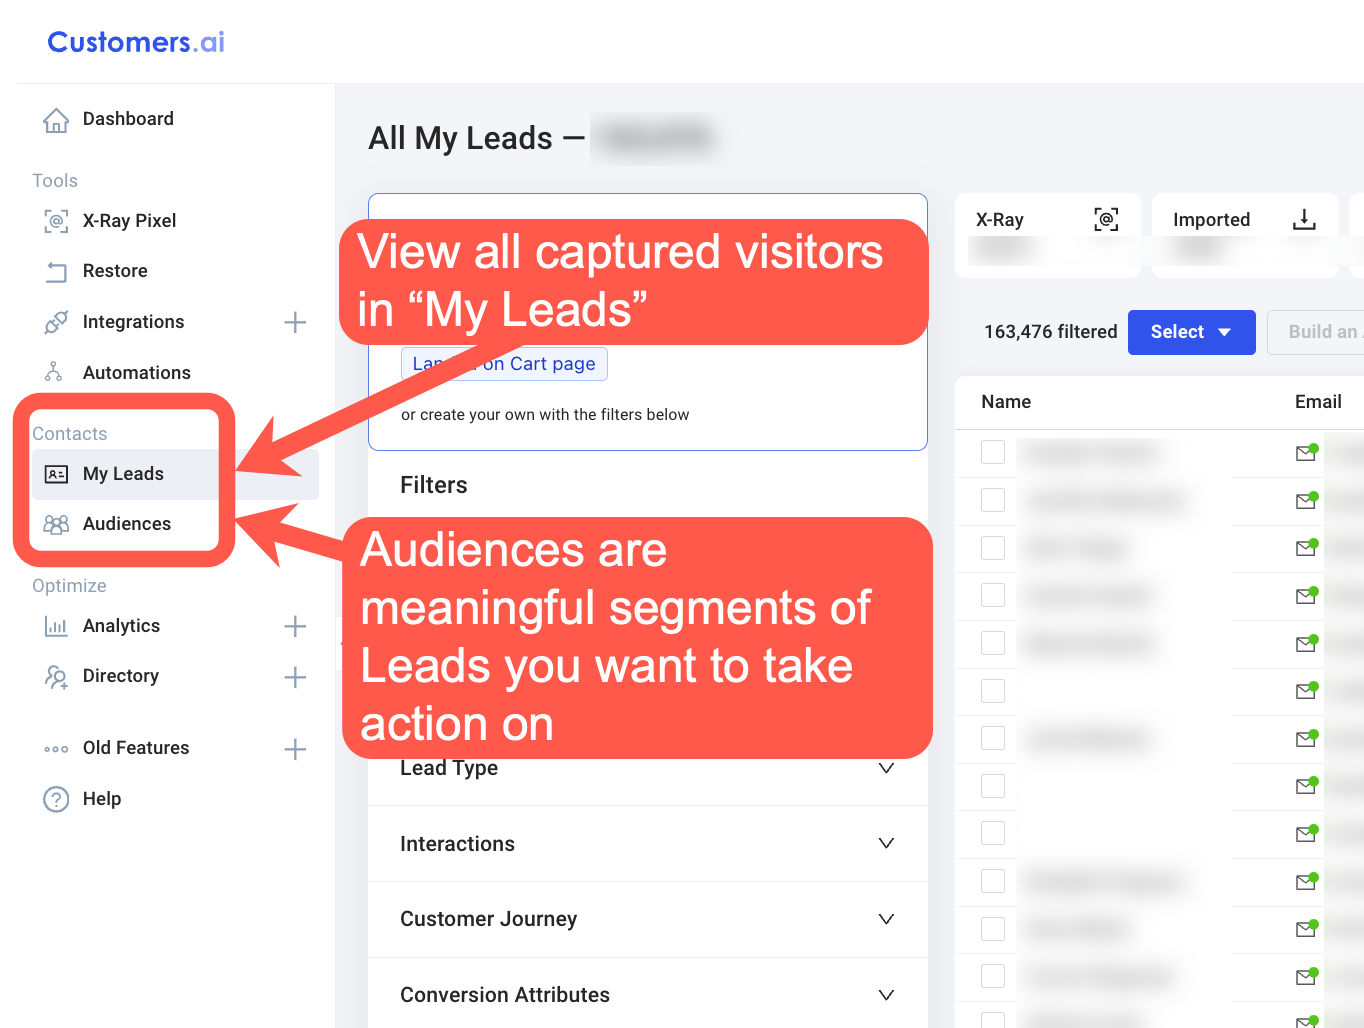
Filtering leads/ Creating an Audience
Filtering leads is available on both the My Contacts tab and Audiences tab.
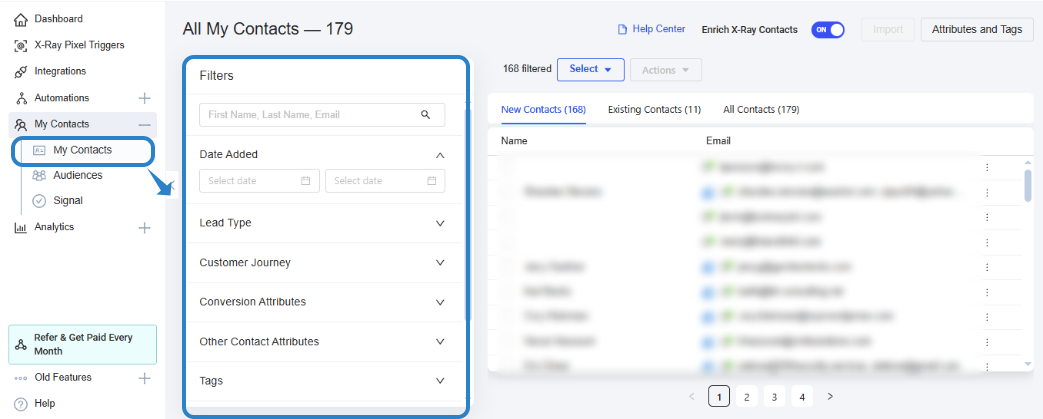

Contacts can be further segmented based on different attributes and tags. This helps ensure that you can maximize efficiency by sending a more targeted campaign, driving better results and fostering stronger connections with your target audience.

Available Contact Attributes
These are the most common attributes available for a contact in Customers.ai. There can be MORE attributes for some contacts depending on what is made available on individual record.
Attribute | Possible Values | Description |
Clicks | 2 | Number of clicks made on a website |
Page views | 3 | Number of web page viewed |
Scroll depth | 0 | Scroll depth on a web page in inches |
Time on site | 145 | Time spent on website in seconds |
Created at | an hour ago | Shows how long ago contact was created in Customers.ai |
First name | Larry | firstname |
Full name | Larry Kim | fullname |
Last name | Kim | lastname |
Link to conversation | link to the contact's conversation on the Inbox | |
User id | 1s9brfqo9xccj | Unique ID for contact in Customers.ai |
Synced to CRM | Klaviyo, Shopify | Shows to which CRMs contact is synced to |
Source | X-Ray Pixel Trigger: X-Ray Leads Personal Emails | Trigger name of source of the contact |
Source old | x-ray | Channel source |
larrykim@customers.ai | Contact's email address | |
Email Domain | customers.ai | Contact's email provider domain |
Email clicked | true/false | Indicates if a contact clicked on a link on an email |
Hot lead trigger | true/false | Attribute identifying contact is identified as Hot lead in automation |
Email opened | true/false | Indicates if a contact opened an email |
Email sent | true/false | Indicates if an email campaign had been sent to a contact |
Form filled | true/false | Indicates if a contact filled out a form |
landing page domain | https://customers.ai/ | Domain landing page belongs to |
landing page full url | Full URL contact landed on | |
landing page url | https://customers.ai/pricing | URL contact landed on |
last session | 2024-11-28T09:56:02.471Z | Indicates when contact was last active |
no interaction | true/false | Attribute identifying if interaction existed |
phone | 18001458796 | Contact's phone number |
suppression list | true/false | Indicates if a contact's email address is included in any suppression list |
suppressed email | true/false | Indicates if a contact is included in any email suppression list |
suppressed phone | true/false | Indicates if a contact's phone is included in any suppression list |
sms sent | true/false | Indicates if an SMS has been sent to the contact |
unsubscribed | true/false | Indicated if contact unsubscribed |
age range | 55-64 | Age range of contact |
direct number | +16021018989 | direct number of contact |
children | true/false | Indicates if a contact has child/children |
gender | F/M | Indicates gender of the contact |
homeowner | true/false | Indicates if a contact owns a home |
married | true/false | Indicates if a contact is married |
mobile phone | +16025559999 | Contact's mobile phone number |
income range | $75,000 to $99,999 | Indicates the income range of the contact |
net worth | $150,000 to $249,999 | Indicates the income range of the contact |
personal address | 47 Vivian Street | Street address of the contact |
personal city | Phoenix | City of residence of the contact |
Personal Email Validation Status | Valid (Digital) | Indicates if the personal email captured for the contact is valid |
personal phone | +15164669999,+19176773333 | Contact's personal phone number |
personal state | AZ | Last known City of residence of the contact |
personal zip | 85022 | Zip code of last known residence of the contact |
web sessions count | 2 | Indicates number of times contact visited the website |
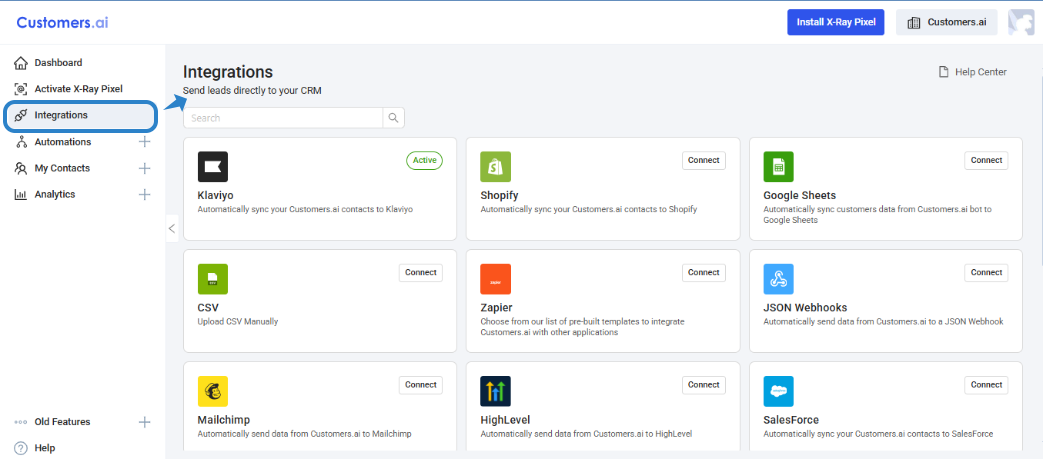
Using Audience Segments
1. Sync it to your CRM via Integrations. Please refer to each individual article for instructions for each CRM Integration
2. Use it as an Audience for your Email Outreach.
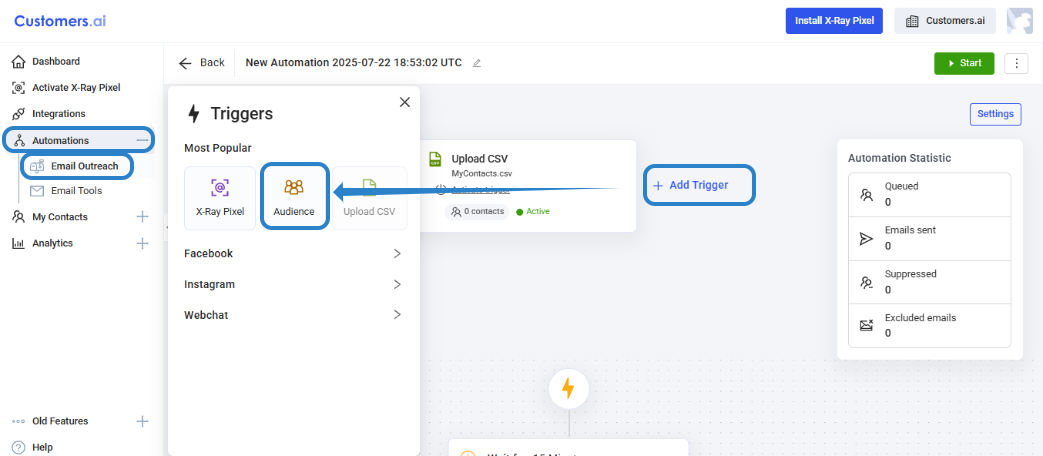
Take note that, if you are have the X-Ray Pixel as trigger to your Email Outreach, you can use the same principle of creating an Audience using the CONDITION.