10-Point Checklist to Get a Marketing Bot Right the First Time
Are you creating a chatbot? Want to get it right first time?
Customers around the world would rather chat with brands than email or call them, so your ability to make a bot that can talk to your customers online is key to your brand’s success and future growth. Customers.ai is leading the chatbot revolution.
Chatbots can handle an unlimited number of conversations at a time, enabling you to connect with an infinite number of customers.
So if you’re just starting out with bot marketing or want to make sure you’ve covered all your bases, we’ve created this comprehensive chatbot checklist.
Chatbot Checklist Item 1: Know the goal and include a CTA at the end of the funnel.
Chatbot checklist step 1 is all about setting your intention for the bot you build. Then putting the bot to work by creating a conversation that leads to those wonderful Call To Action buttons.
Before you create a bot you’re going to have a goal and user intent in mind. Then you’ll build the conversation around that user and goal.
Is the bot going to promote content, sign someone up for an event, schedule an appointment or is it a customer support chatbot? Know that going into designing the chatbot funnel.
Did you know that you can include CTA buttons in your chatbot dialogue, as well?
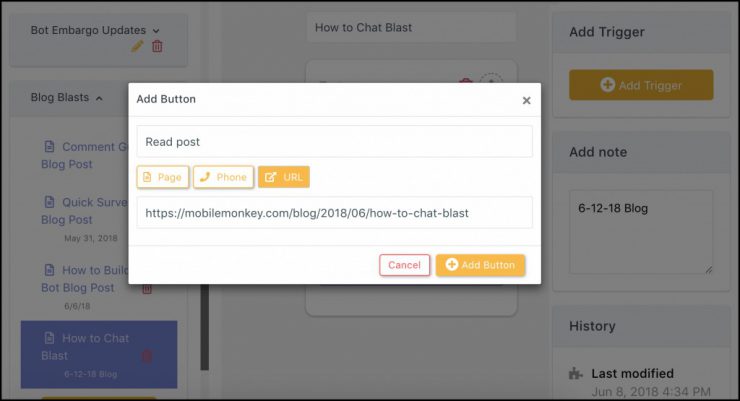
You can! At the end of the funnel (or the end of the conversation flow you design) you should always include a CTA button.
Invite your reader to sign up for an email list. Take them to your website to view a product or blog post. Have them fill out a customer survey.
Use your bot to point customers or future customers to useful ways to deepen a relationship with your business.
We’ll dive into exactly how to put together a goal-oriented chatbot conversation throughout the next steps of the chatbot checklist.
Chatbot Checklist Item 2: Decide your chatbot’s personality.
Step 2 on the chatbot checklist is as important as it is fun!
You have to decide what your chatbot’s personality will be.
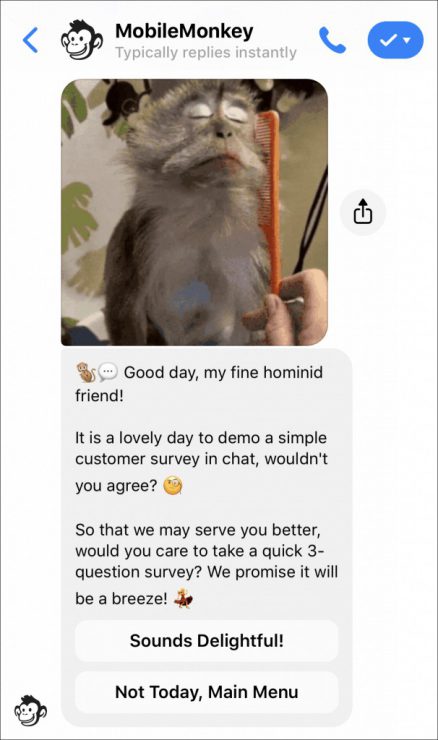
According to consumer research, the most important thing a chatbot needs to do is help people do what they want or give them info they need. A chatbot’s personality or entertainment value is second to a chatbot’s function.
Still, customers are more likely to rate a chatbot as useful the more engaging it is.
A business’s chatbot is an extension of its brand. So in order to create a bot, you have to decide what tone your chatbot will take. Will it have a name? Will it have a story?
How will it address users? How will it greet them? Will it be funny, intelligent, quick-witted? Will it rely on internet memes and jokes to relate to users?
Once you’ve decided on a personality for your chatbot, you have to make sure you stick with that style and tone.

The chatbot’s personality will only really be evident if it’s consistent throughout the user’s interaction with it, so make sure that you follow through!
Chatbot Checklist Item 3: Create a dialogue.
Next up on our chatbot checklist is an important step in creating any Facebook chatbot; making a chatbot dialogue.
Dialogues are important because they are how the chatbot will actually engage in conversation with a user.
In the Customers.ai Chatbot Builder, navigate to the Dialogues section. You’ll want to create folders for your various dialogues to keep them organized and easy to access while you’re building your chatbot.
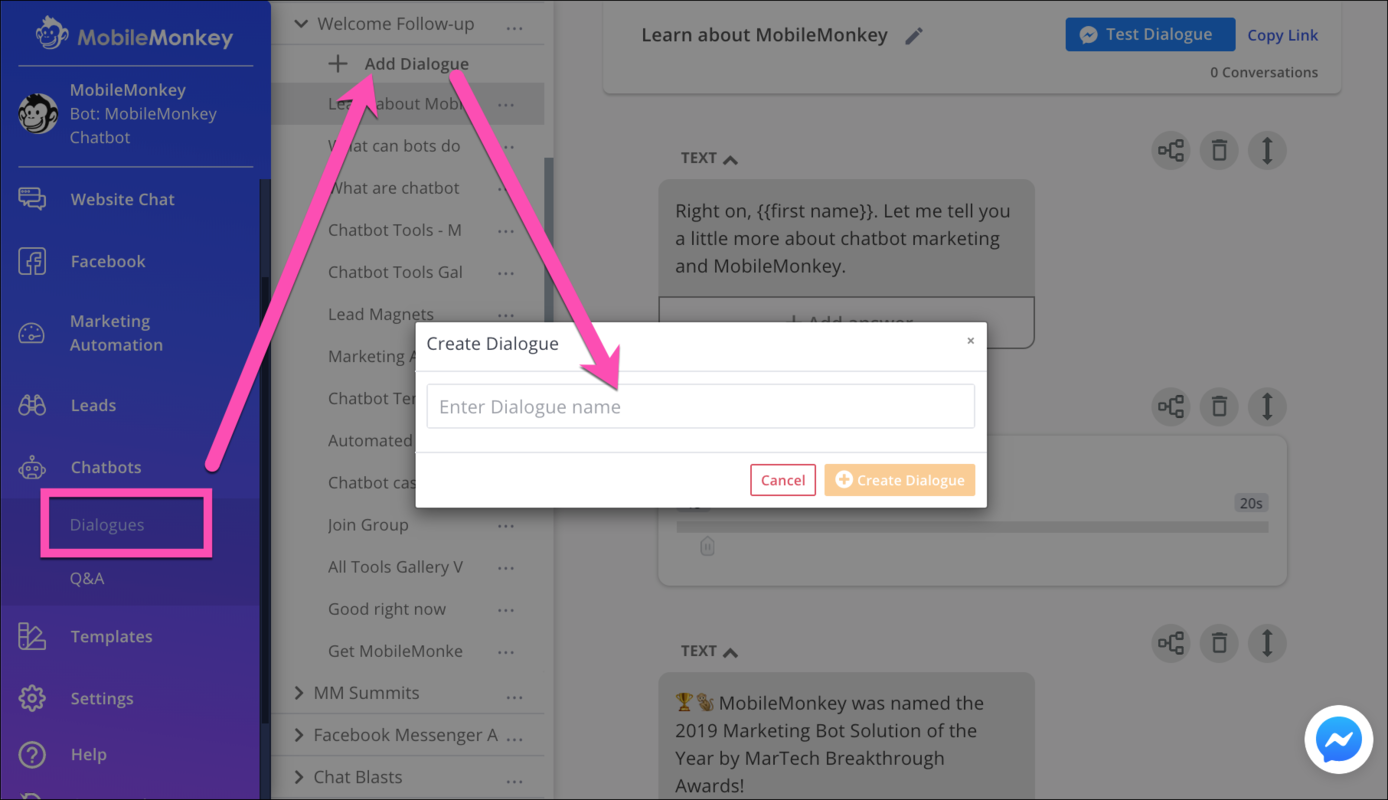
The dialogues are points in the conversation with the chatbot that the user will reach by saying certain things or interacting with certain buttons and quick replies.
Chatbot Checklist Item 4: Add content with widgets.
Now that you’ve added a dialogue to your chatbot it’s time to add content widgets to those dialogues. Dialogues are like the frames and widgets are the content within the frame.
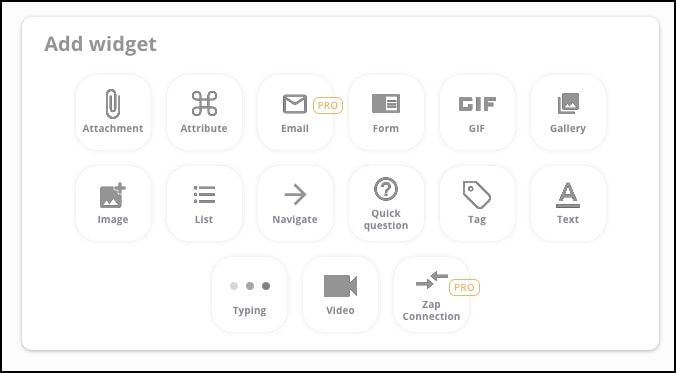
Use widgets to add engaging content to chatbot conversations. Customers.ai features essential and fun widgets such as:
- Text
- Images
- Image galleries
- Native video
- Attachments and PDFs
- GIFs
- Email notifications that send hot lead alerts to your sales or CS team
- Navigation elements
- Questions and forms
You can choose widgets that push the conversation forward, such as questions and forms or navigation elements.
You can also choose widgets that make the conversation feel more personal to the user, such as including relevant GIFs or a typing feature, to make the chatbot appear more natural by providing a little breathing room between texts.
Certain chatbot widgets involve more conversion elements than others. For example, form widgets are a great way to collect data from the user that you can add to your Facebook Messenger contacts customer profile.
In order to keep the conversation going, you can connect your various widgets back to different dialogues.
In addition, you can include different CTA buttons that connect a dialogue to another dialogue or to a URL on your site.
Chatbot Checklist Item 5: Use personalization.
Another addition to the chatbot’s personality is the personalization of the chatbot experience.
Which brings us to the next chatbot checklist item, personalizing the user’s experience in conversation with the chatbot.
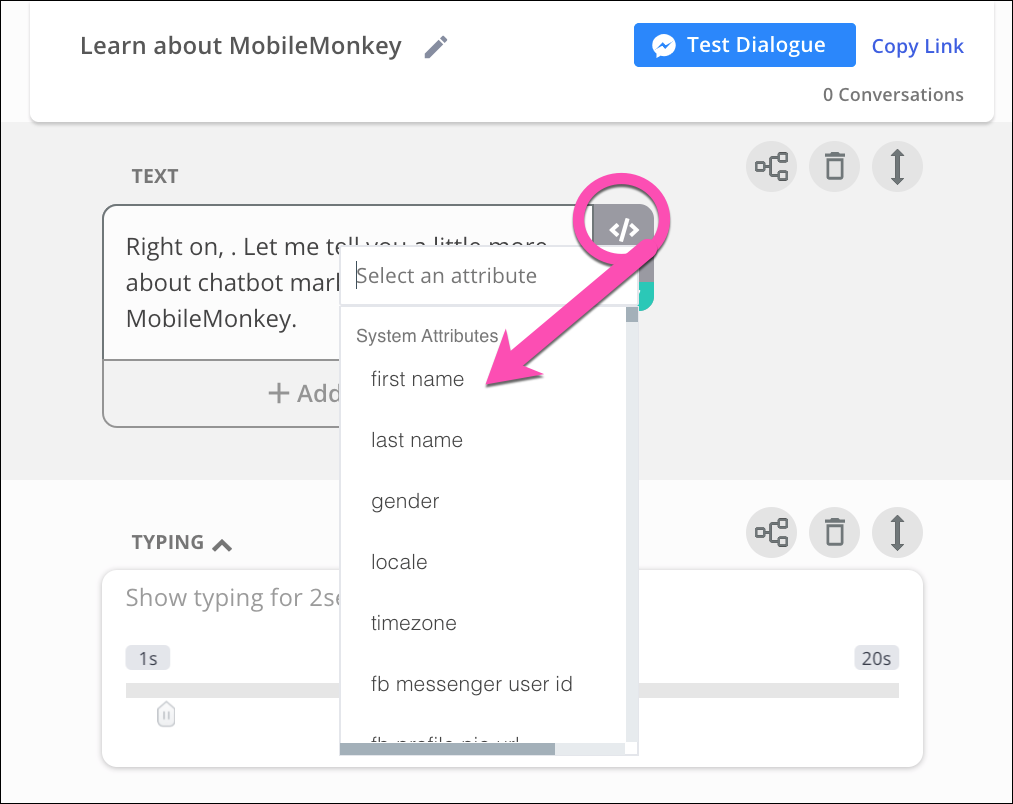
This chatbot checklist item requires a few decisions to be made. Will the chatbot dialogue use first names or first and last names?
Remember, people love reading their own names, so at least personalize the conversation with their name!
What other personal details will your business want to know, ask and collect via the chatbot?
These answers might vary based on your business and/or the purpose of the chatbot. Deciding between formal and informal tones will reflect on what the bot is being used for and what it is representing.
Decide on a couple more variables to include in the personalization experience. Then you can check off this chatbot checklist item!
Chatbot Checklist Item 6: Add keyword triggers.
At this point you’ve got your chatbot’s goal in mind and its personality and content is engaging and conversion focused. Now you’re ready for people to talk to this bot.
You can do this by adding triggers for your bot dialogues.
Q+A triggers are words that a user can type in the chat that trigger different dialogues from the chatbot.
For example, if someone types “hours,” the chatbot can respond back with your business’s hours. If someone types “pricing,” the chatbot can respond with your services or product’s pricing.
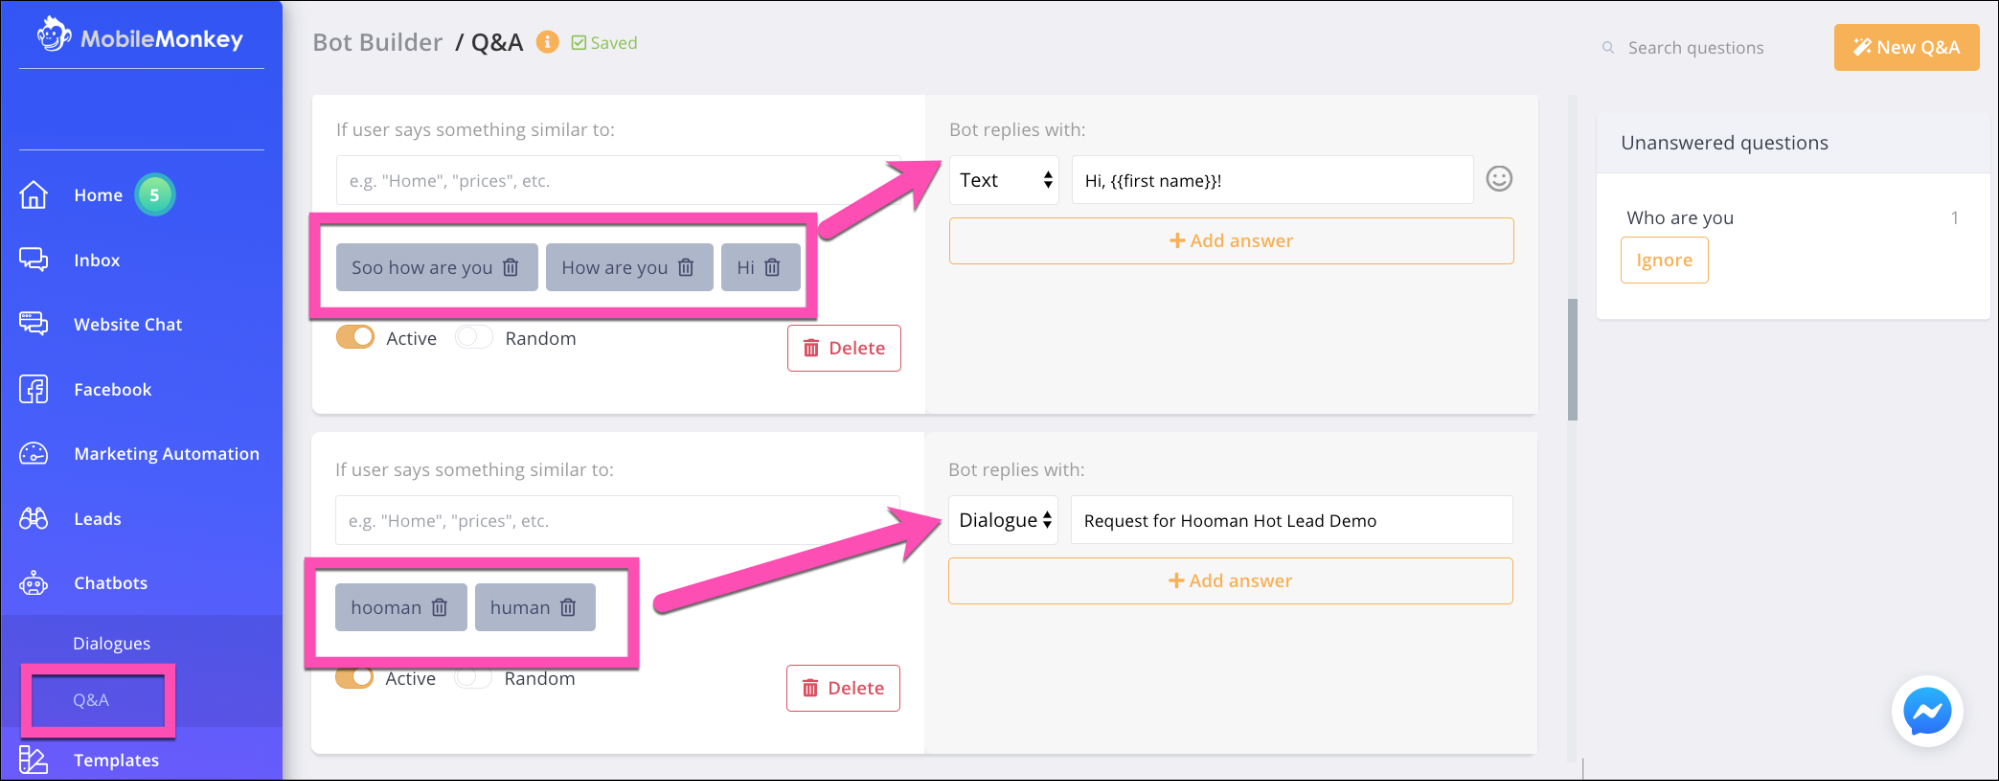
Add trigger words to your chatbot by navigating to the Q+A bot builder to add FAQ chatbots or by selecting “add trigger” when you’re in the dialogue bot builder.
Chatbot Checklist Item 7: Give users a path.
Now that you’ve reached chatbot checklist item 6, you’ve likely built dialogues for your chatbot and added some triggers to aid in the conversation experience for the user.
The chatbot isn’t an all-intelligent AI that uses machine learning to divulge information from the user. Rather, they rely on user engagement to drive the conversation forward.
For this reason, it’s important to create intentional paths for a user to go down in order to get them the answers they need.
The easiest way to do this is by including options, specifically in option menus.
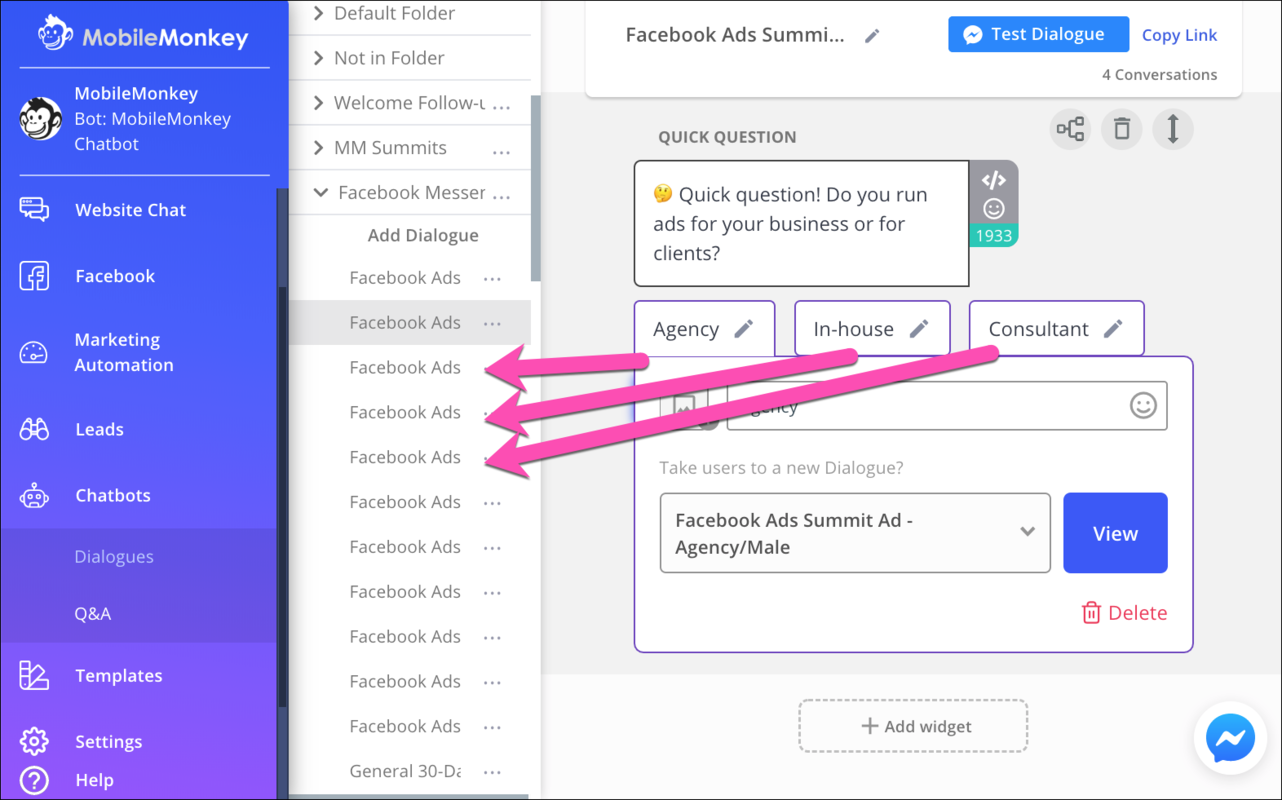
This way, the user can select from the menu and continue down a predetermined path where they will find other menu options and buttons.
Like a phone tree, this brings the user through a segmented path where engagement (and knowing what to do and where to go next!) is easy.
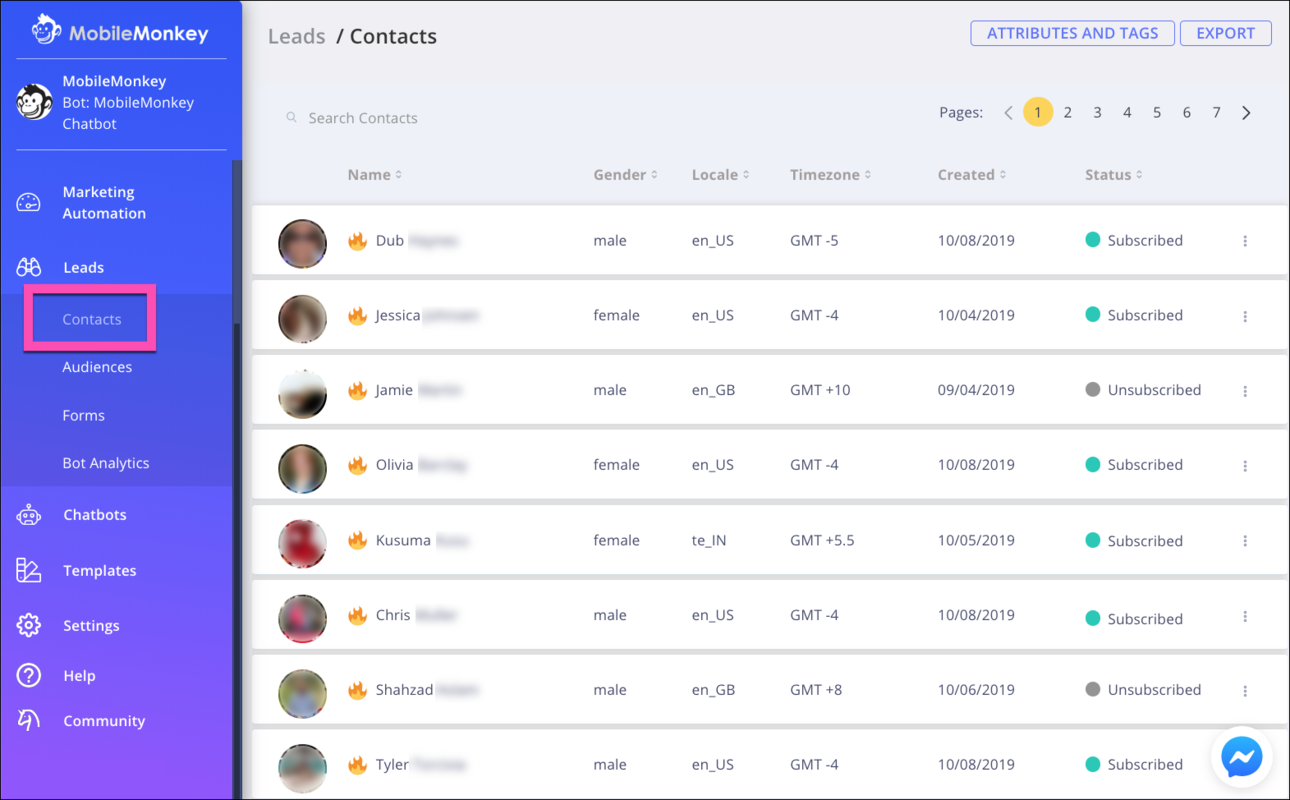
Chatbot Checklist Item 8: Save user responses and segment audiences based on user response data.
While giving these user options and personalizing their experiences, consider taking it a step further with the next chatbot checklist item: saving user responses for creating audiences later!
When you ask users for their names, or phone numbers, or locations, or email addresses, or any of these variables to personalize their experiences, you save the user responses to unique customer profiles.
You can then segment the customer profiles into audiences based on any of the customer attributes you’ve saved — from where they’re located to what they’re looking for or their budget, whatever variables you’ve chosen to ask of people chatting with your bot.
Once you’ve collected and saved contact or user info and segmented them into audiences, you can remarket to those audiences with follow-up messages, drip campaigns, ads and more, at a later time.
Chatbot Checklist Item 9: Test your chatbot.
At this point you have a fully functional chatbot that replies to users, saves user responses to contact profiles, allowing you to send messages to contacts with follow-up messaging with future offers!
Or, is it fully functioning? There’s one way to find out —
Test your bot!
You can test your chatbot in a couple ways; either by the “test this bot” button while in the chatbot builder.
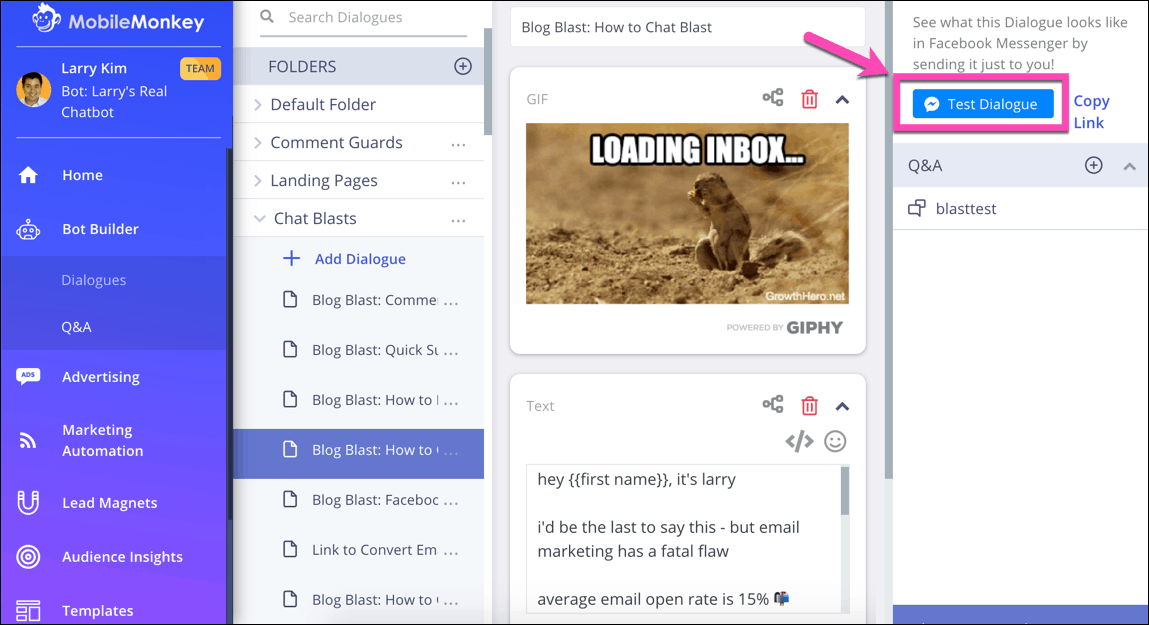
Or you can test your bot by chatting with your chatbot and triggering the response with one of your chosen Q+A triggers.
It’s important to test your chatbot because then you’re able to see if all of your dialogues, widgets, and buttons are working properly, as well as how the content looks when experienced on mobile.
Now, on to the final step of the chatbot checklist — getting your chatbot out there!
Chatbot Checklist Item 10: Set up different entry points to your bot.
You’ve reached the end of the chatbot checklist.
But this last step is key to making your chatbot a power player for marketing your business, and that’s setting up the entry points to your chatbot.
In order for a chatbot to begin having a conversation with a user, the user has to start a conversation via an entry point.

Here are a few ways someone might start a conversation with your bot, which you get to set up at this point of the chatbot checklist:
- Sending a message to a Facebook business page
- Commenting on a Facebook Page post that has a chatbot comment guard autoresponding to commenters
- Clicking the “send message” CTA button in a click-to-Messenger ad
- Clicking a link or button from an email, social media or web page
- Clicking the Send Message button from a Customers.ai landing page
- Chatting with your bot from the chat widget on your website (as you can see in the screenshot below)
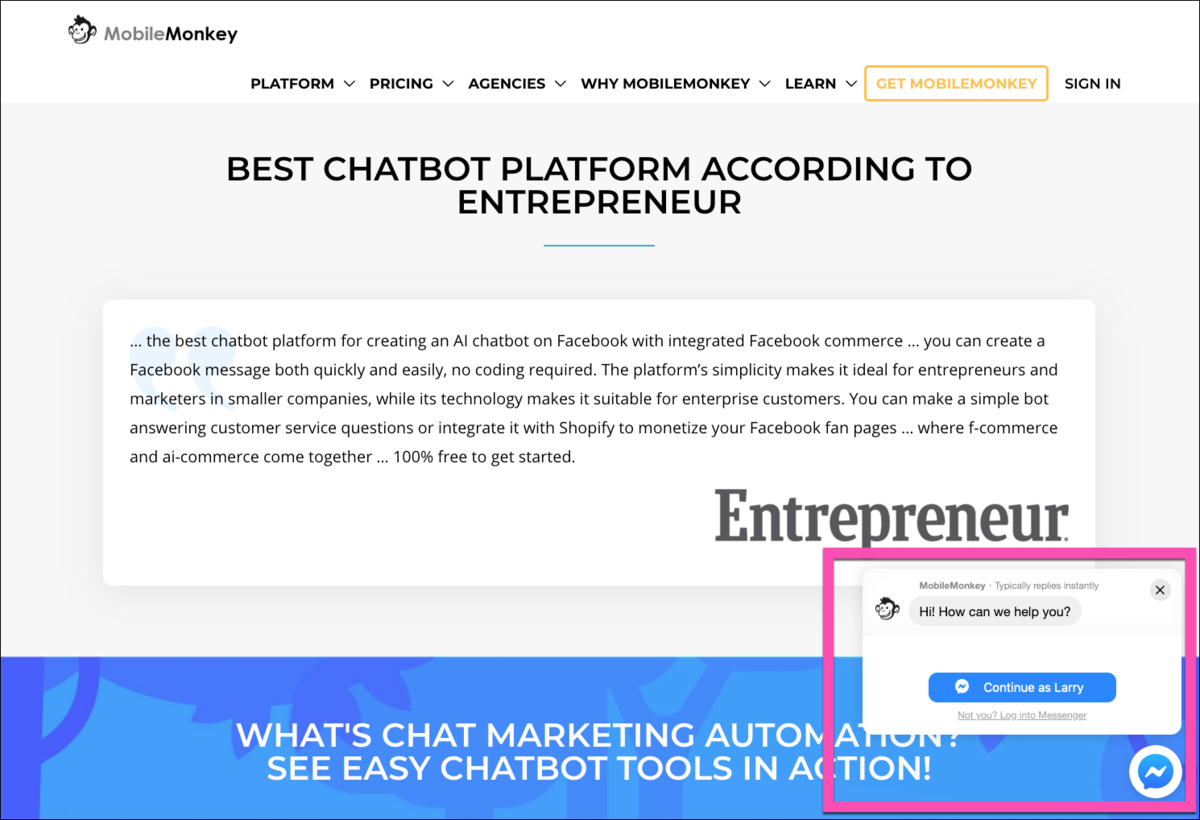
As soon as a user or potential customer messages the chatbot from any of the many different entry points, a conversation is triggered, that user becomes a contact in your Customers.ai database, and you can engage in a conversation with them and assist them in their customer journey.
The more entry points you have to your chatbot, the more opportunities users have to engage with your bot.
Now that you’ve checked off chatbot checklist item 10, you’re done with the chatbot checklist!
Important Next Steps
- Get Customers.ai for FREE (non-expiring, UNLIMITED contacts) and complete the chatbot checklist yourself!
- Join the private Customers.ai Island community on Facebook and share your ideas and questions.
- Send Customers.ai a message to get occasional news updates and tutorials on chat marketing.